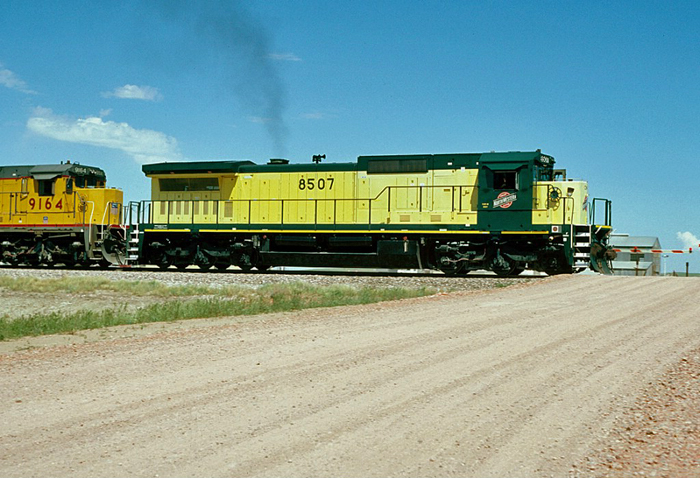
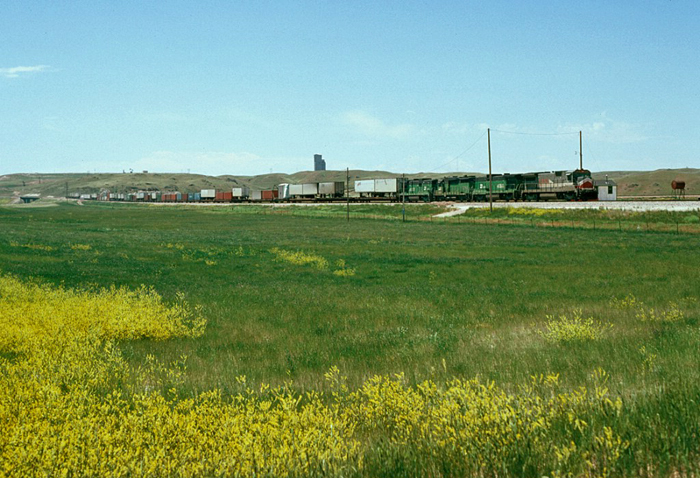
BN, CNW, and UP on the Orin Line - 1990For most of the summers during my high school and college years I managed to scam at least one trip to visit the Powder River Basin in Wyoming. Here is where the newest and biggest power of the western railroads could be found powering coal trains. Coal trains were almost completely absent from railroading in New Orleans at the time so that was also a huge draw for me. I pulled a 1 hour and 16 minute clip off of a VHS tape and whittled it down to just over 25 minutes edited. Below is the upload to YouTube: I am quite pleased with this video and am glad the images will now see the light of day! The stars are a number of C40-8s from the CNW's first order. I am a big fan! The lengthy pace scene with CNW 8507 in the lead is a treasure of raw Dash-8 sound! There is also quite a bit of good Dash-7 sound in this video. It looks like I was shooting slides as well on this trip. A few of them have already been scanned and posted on-line: Chris
0 Comments
Channel Art and 10th Upload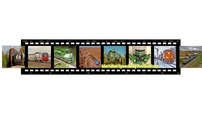 Up until now my YouTube Channel was pretty much a low-priority novelty. Yesterday however, as I uploaded my 10th video with a whole vault of material in the time capsule for future releases, I decided it was time to polish up the appearance of the site. This meant it was time to create the Channel Art for the page header! YouTube specifies that the optimum file size for channel art is 2560x1440 pixels. This is a very large file from which only a narrow strip in the middle appears in the Channel Header. Looking around YouTube, most people have a photo of some sort which is severely cropped. While the overall effect is generally very nice, I wanted a little more control over the space. I decided I wanted a film strip to be the main focus of my Channel Art with various images contained therein. Using PowerPoint I built the filmstrip art and then experimented with the sizing, uploading it several times, until I had the filmstrip art positioned and sized in the 2560x1440 pixel file correctly to where YouTube would crop it to my liking. The image above is the full 2560x1440 pixel image with the art in the final position. Below is a larger version of just the art: Most of the middle six images within the film strip will be displayed on the various devices capable of viewing YouTube. I decided to add a photo extending from each end of the film strip to give a sense of infinity to the image as it is cropped differently for viewing on different devices, i.e. Smart Phone, Desk Top Computer, Tablet, Laptop, etc. For design inspiration I dusted off a roll of film and examined a negative strip. I mimicked the basic writing on the very top and bottom bands with PowerPoint text boxes. The font I chose was CordiaUPC 10pt with a slightly gold color. While not an exact match for the markings on a Kodak negative, I think it is close enough to create the intended effect. The images were strategically chosen to convey the mix of Model and Prototype videos that will be uploaded to my YouTube site. I also put a link to this blog directly in the header. It will be interesting to see how much traffic YouTube drives to this site as both mature over the years to come. As for the 10th video - I found a few gems photographed back home in New Orleans on August 3, 1991. The hi-light of the day was one of only two prototype F69PH-AC locomotives, AMTK 451, leading the Amtrak Sunset Limited up the Huey P. Long Bridge. Our perch for the shot was the top floor of the Elmwood Medical Center Parking Garage. This location provided a spectacular vantage point for train activity on this impressive bridge. If you have not already viewed this video, check out the link below! Be sure to Subscribe!
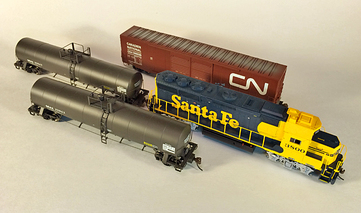
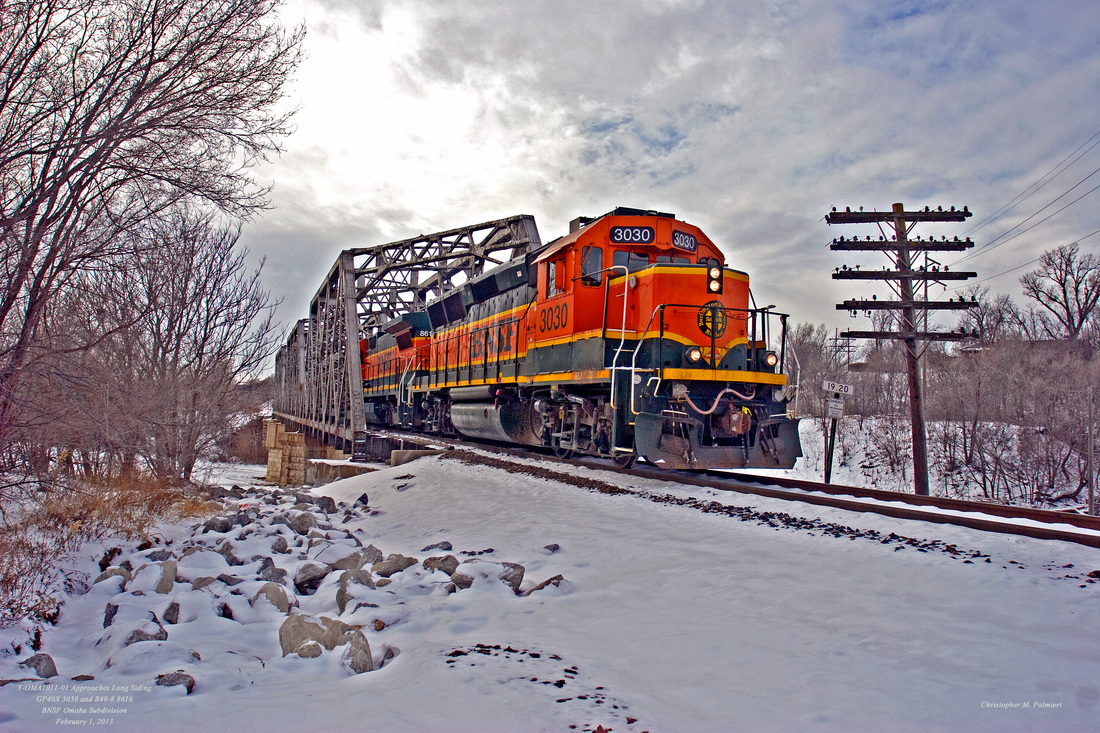
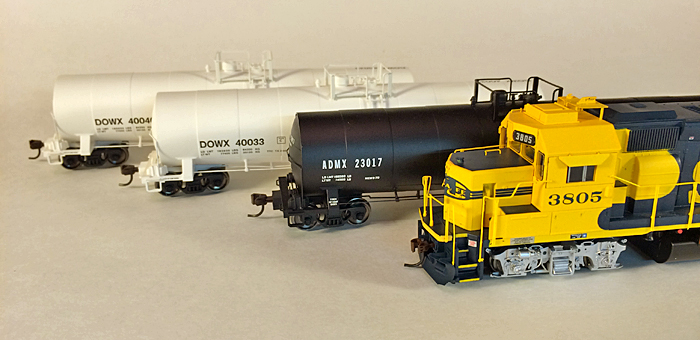
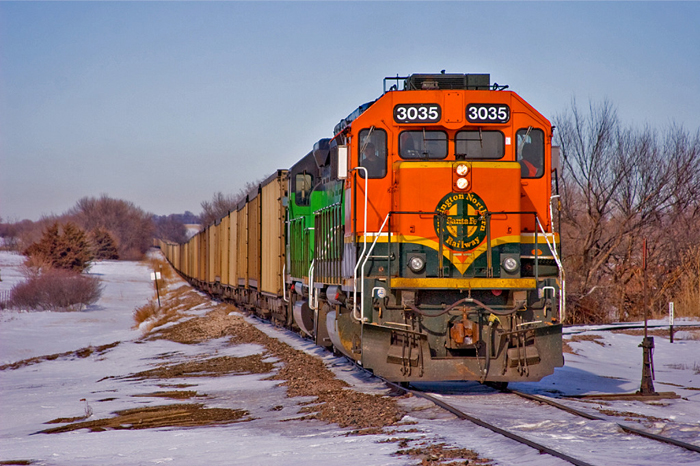
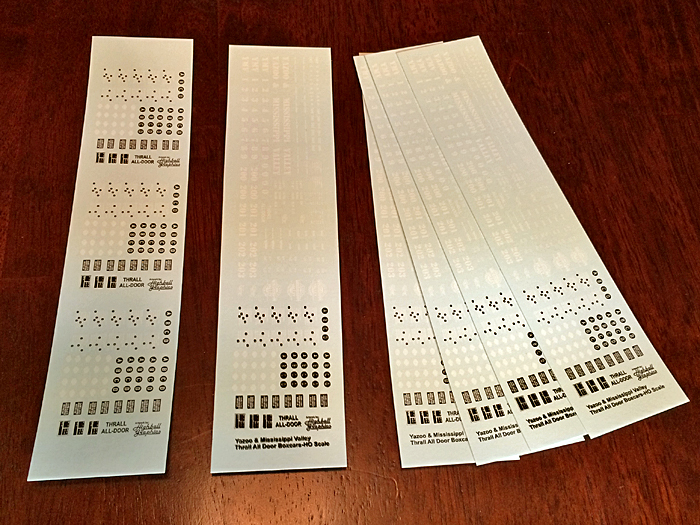
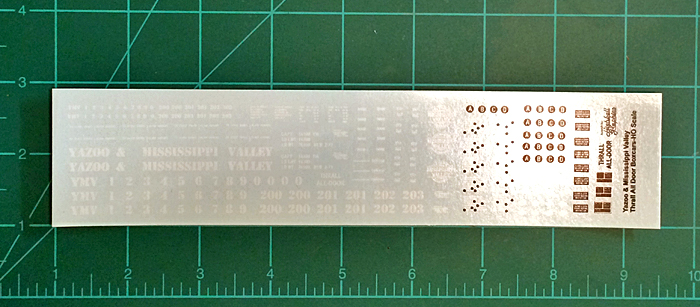
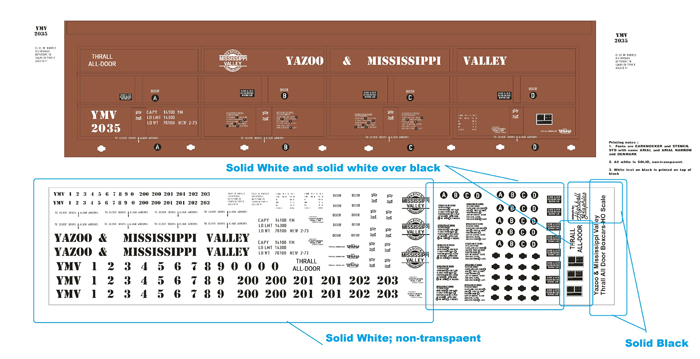
Chris Equipment Deliveries 8/31/15 and 9/17/15I did not post the equipment received on 8/31/15 so I will combo the that delivery with the one received today in this single post. Greg McComas has an Athearn RTR GP40X which I was fortunate enough to operate on his railroad. I have to say I was quite pleased with the way it ran! This has changed my perception of the suitability of Athearn RTR models in the operating environment. I was quite pleased with the Athearn model of the ATSF 3800! Not perfect, but very good looking none-the-less. This model includes some of the Santa Fe features of my era including the lowered headlights in the nose and removed classification lights. The particular locomotive represented by this model is one I have become particularly fond of. While I was assigned to work in Lincoln, Nebraska, two BNSF GP40X's were assigned there for use in local service on the Nebraska Division: BNSF 3030 and BNSF 3035. These units began life in 1978 as ATSF 3800 and ATSF 3805. The BNSF 3030 (Ex ATSF 3800) is the subject of one of the photos I left hanging on the wall in the Lincoln Yard Office and is also the image that has been my screensaver for some time: This photograph was taken in Omaha, NE on February 1, 2013. It was paired with a B40-8 working the Y-OMA1011-01 industry yard job which services customer out on the Omaha Subdivision. This is one of my favorite photographs that I took while living in Lincoln. Being quite please with the Athearn model of the ATSF 3800, I decided that I just had to get the ATSF 3805 while it was still available! The above pictured equipment arrived today (9/17/2015): Athearn RTR GP40X ATSF 3805 and three Atlas ACF 23500 gallon tank cars: ADMX 23017, DOWX 40033, and DOWX 40040. These two GP40X's will fit nicely in my fleet of Santa Fe locomotives intended to power Richmond and Los Angeles to Atlanta hotshot intermodal trains across the Meridian Speedway! And these two have special meaning for me. Below is a shot I took of the BNSF 3035 (Ex ATSF 3805) shoving an empty coal train set onto the Palmer Branch off of the Ravenna Subdivision in Aurora, Nebraska on January 9, 2013: As for the freight cars, the videos from the 1990's that I am now digitizing and uploading to YouTube show trains full of generic tank cars and hopper cars. The tend to be the "Meat-and-Potatoes" of manifest trains in the south at the time. The tank cars in this release from Atlas are a perfect fit. You just cannot have too many tank cars...... As for the CN boxcar, I just like it! Chris Highball Graphics Y&MV Custom DecalsAn envelope arrived in the mail today from Highball Graphics. Inside were the five sets of custom decals designed by Hank Stephens to Y&MV specifications. These are the first decals I have ordered from Highball Graphics. Each sheet contains both white and black-and-white artwork. Of the five sets, two of them had blurred black artwork, however and extra strip containing three copies to the black-and-white images was included so all is well! I look forward to working with these decals in the very near future; however, the airbrush paint booth requires a few finishing touches before the first two Thrall Door boxcars will receive their coat of Y&MV brown. The Meridian Speedway Decal Page has also been updated with the addition of this decal set. The button below will take you to the Decal Page: This decal set is very specialized as it applies to one specific group of cars, Y&MV 2000-2044. These are Thrall All-Door boxcars represented by the current Walthers model. The Y&MV freight car roster can be accessed via the below button: "A Southern Pacific Evening" and "SP Action at Westlake, LA"Slowly but surely, I am getting more of the old VHS movies uploaded to YouTube. The latest two are focused on the Southern Pacific: Chris
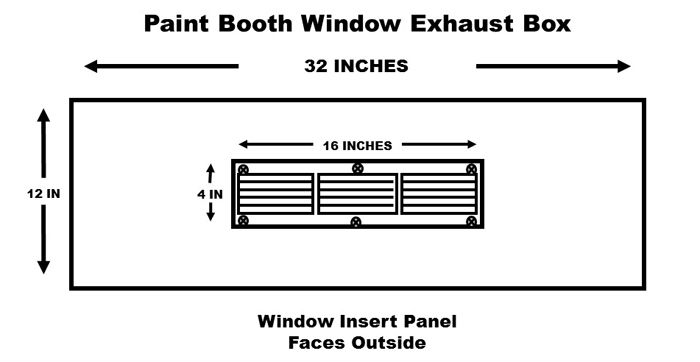
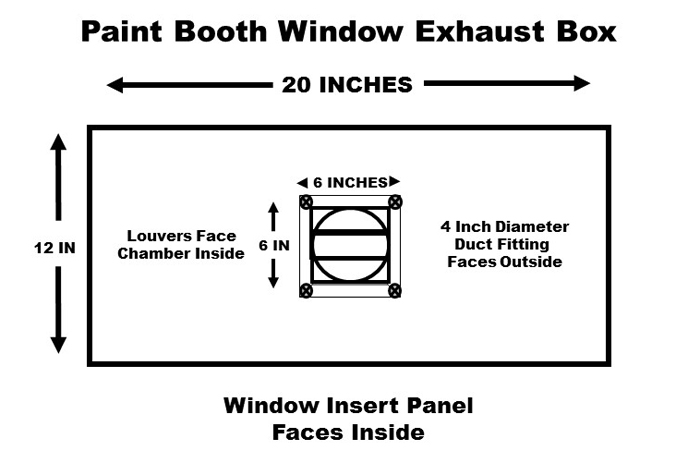
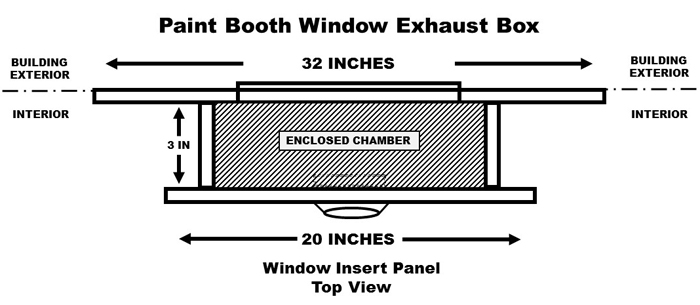
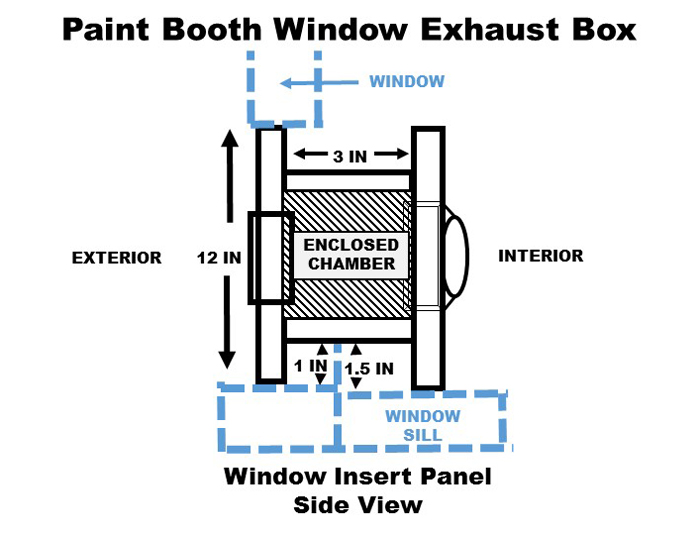
Window Exhaust Box Concept on Paper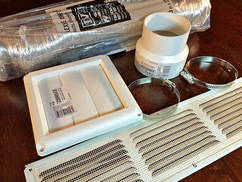 The Airbrush Paint Booth is designed to capture all of the air contaminated by harmful vapors during the painting process and keep them out of the indoor breathable air supply. The design of the Paint Booth itself has to be functional and efficient. Once captured by the ventilation process, there must be a seamless flow to export the contaminated air to the outside. This is where the Paint Booth Window Exhaust Box comes in. The fan exhaust is a 3-inch diameter pipe which can easily connect to 3-inch foil dryer duct. While this duct could be run to the outside through an open door or window, that would leave an opening that would allow outside air (even the exported contaminated air) to flow freely into the indoor environment where painting is taking place. 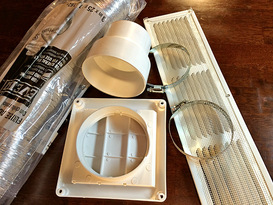 I decided that the logical exit port should be a window as it could be closed tightly around an exhaust panel that was sized properly. Off to Home Depot I went to examine available components and formulate the design. There is enough wood left over from the 4'x8' piece of plywood used to construct the paint booth itself, so additional wood was not needed. I also had on-hand a 16-inch by 4-inch vent panel that I had purchased earlier for the paint booth but ended up not using. This also will fit into the Exhaust Box design. Additional materials purchased for the exhaust box were: 1) One 3-inch x 25-foot flexible aluminum foil duct 2) One 3-inch to 4-inch diameter duct increaser 3) One 4-inch diameter louvered exhaust hood (6" x 6") 4) Two 3-inch adjustable metal worm gear clamps 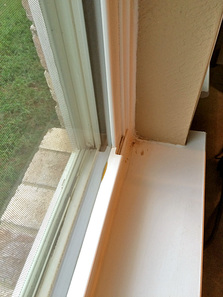 Next I picked a window and took some measurements. It is important to note that the dimensional specifications in the below design are specific to fit the window frame opening that I will be using. If you will be building a window exhaust box, you will need to adjust as appropriate to fit your window design and opening. The width of the main window opening is 32 inches. This 32 inch width which fits snugly under the raised window and fits flush against a slightly narrower external opening. This will make it very easy to seal off the outside air from the room interior. Looking at the hardware components and sill/frame outline, I decided that a height of 12 inches would be appropriate for the design of the Window Exhaust Box. Rather than free-handing the design drawing like I did for the Paint Booth, I decided to use PowerPoint for the below drawings. These drawings are NOT to scale! Hopefully they are easy to understand: Drawing 1 - Exterior Window PanelThe exterior window panel is the largest component. This is the exterior wood face of the Exhaust Box that fits snugly into the window opening. This window opens by lifting the bottom window upward. The bottom and two sides will be surrounded by the window frame. Once in place, the window can be lowered until it contacts the top of this panel, completing the seal between the outside and the inside. The 16-inch by 4-inch vent cover is the only piece of hardware that will be attached to this panel. This vent will be cut directly in the center of the panel. Drawing 2 - Interior Room PanelOpposing the Exterior Window Panel is the Interior Room Panel. This panel does not need to be as wide as the window panel, but it does need to be wide enough for a connecting chamber to be built between the two panels containing airflow between the two. Therefore the 16-inch wide exterior vent cover and the 6-inch square louver cover will have to be within the dimensions of the inner chamber. I decided that a width of 20 inches and a matching height of 12 inches would be sufficient Drawing 3 - Exhaust Box Top ViewThe top view shows how the panels will come together. Airflow from the 3-inch diameter flexible foil duct will enter the chamber via the 3-inch to 4-inch adapter that connects to the 4-inch diameter port of the inward-facing louvered exhaust hood. The louvers open easily in the direction of air-flow and shut when the fan is off keeping small critters outside and sealing off any reverse air flow. From here the air enters a small chamber that forces the air to exit the window through the 16-inch by 4-inch vent in the exterior window panel. Drawing 4 - Exhaust Box Side ViewThe side view reinforces the top view. Measurement of the window revealed that the top of the window sill is actually 1/2-inch lower than the top of the window opening on which the Exterior Window Panel will rest. There is also a 1-inch lip extending upward from the window sill that seals off the bottom edge of the window when it is fully lowered. Therefore, the bottom of the enclosed chamber connecting the interior and exterior panels much be high enough to clear this lip. The interior panel will also be placed 1/2-inch lower than the exterior panel to compensate for the lower sill. This will make sure that the exterior panel is "At Rest" in the snug position in the window opening. For the purpose of these drawings I have indicated a depth of three inches for the connecting chamber between the two panels. The sill dimensions will allow a total depth of seven inches. As I review the proximity of the Louvered Exhaust Hood to the external vent I ma consider some additional depth - perhaps five inches to reduce the velocity of deflected air off the inside of the external window panel. Chris
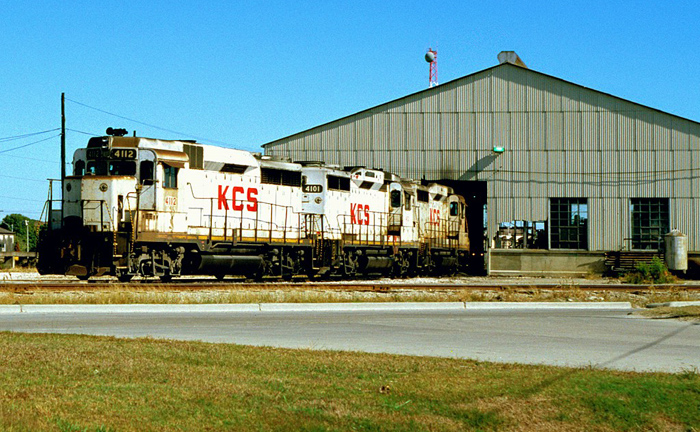
First Y&MV Freight Car Decals Ready To Go To PressThe Y&MV has outsourced the development of the decals for its fleet of Thrall Door Boxcars to the Design Team at Stephens Railcar of Dadeville, Alabama. While the actual placement of some of the items may be adjusted on these cars, all of the components are in place!  Many thanks to Hank Stephens for his assistance with this project. This particular decal set was particularly labor intensive with much small writing, including the door opening and closing instructions. Working through the revisions was a pleasure. Hank made the process very user friendly. I specifically requested that he include a "Stephens Railcar" shop logo as I would like to simulate some cars painted by an off-line shop. Inspiration for the concept came from the logos for Zwolle Railcar that I recall seeing stencilled on cars painted by Zwolle Railcar of Zwolle, Louisiana in the 1990's. As soon as I can find a photograph of that logo I intend to have it included in a future decal set. Highball Graphics will print the decal sets. This will be the first time I have worked with this company. They come highly recommended and I am looking forward to the process. Now I need to design and complete the window vent for my spray booth exhaust so that I can get the first two boxcars decal ready! Chris KCS GP30s Remembered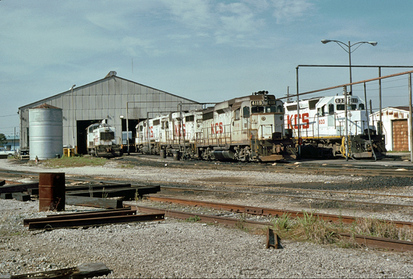 My latest VHS Video to YouTube upload is a gem--the final departure of KCS GP30s from the New Orleans area railroad scene. During the 1980's any dayllight visit to the KCS West Yard diesel shop would find a trio of KCS GP30's laying over between nocturnal runs of the Baton Rouge Turn. An additional GP30 or two were commonly on-hand as well. On August 3, 1990 that changed forever and I was lucky enough to record the event. The KCS bought 20 GP30s during 1962-63, and the last of these were taken out of service in 1990. In their final years of operation, six of these were assigned to the diesel shop in New Orleans. Three were used on the nightly turn to Baton Rouge, one each was used at Norco and Gramercy, and one was kept as a spare. In late July and early August 1990, four GP40s were assigned to New Orleans, and the GP30s were moved to Shreveport. GP30s 4103, 4109 and 4115 left on Saturday 28 July, while the 4112, 4106 and 4113 went out for the last time on Friday 3 August. Here are the last three units leaving New Orleans on their final run. This was intermodal train No. 10 with SD60s 723 and 716, 38 cars and caboose 309. The 4106 and 4113 were sold to the Indiana & Ohio as their 83 and 84, while the 4112 went to the Southeast Kansas Railroad and kept its same number. Chris
June 2, 1991 - EsPee Action Uploaded to YouTubeToday's YouTube upload provides a look at activity on the Southern Pacific in Lake Charles, LA on June 12, 1991. Three trains star beginning with eastbound Houston to New Orleans/CSX train HOCXM accelerating out of the east end of town with three CSXT GP40s: 6245, 6794, and 6717. During the beginning of this clip we can hear the train dispatcher giving the second train, SP 7338 west, DTC authority in blocks Westlake through Sabine. So we head west and catch SP SD40R 7338 and SP B30-7 7869 rolling towards Westlake with Avondale, LA to Strang, TX train AVSRM - the classic Nathan P3 horn sounding great! Finally we head back into town to see a pair of SP SW1500's, 2498 and 2662, crossing over the main track and pulling into town with interchange traffic from the Union Pacific. This set ends with some pacing action! Chris
Amtrak Train No. 1 - VHS to YouTubeI uploaded another VHS clip from the past to YouTube today. There are not many videos on-line of the long-gone Amtrak P30CH locomotives in action. Here we can see two of them leading Amtrak train No. 1, the Westbound Sunset Limited, through Lake Charles, LA in June of 1991. Chris
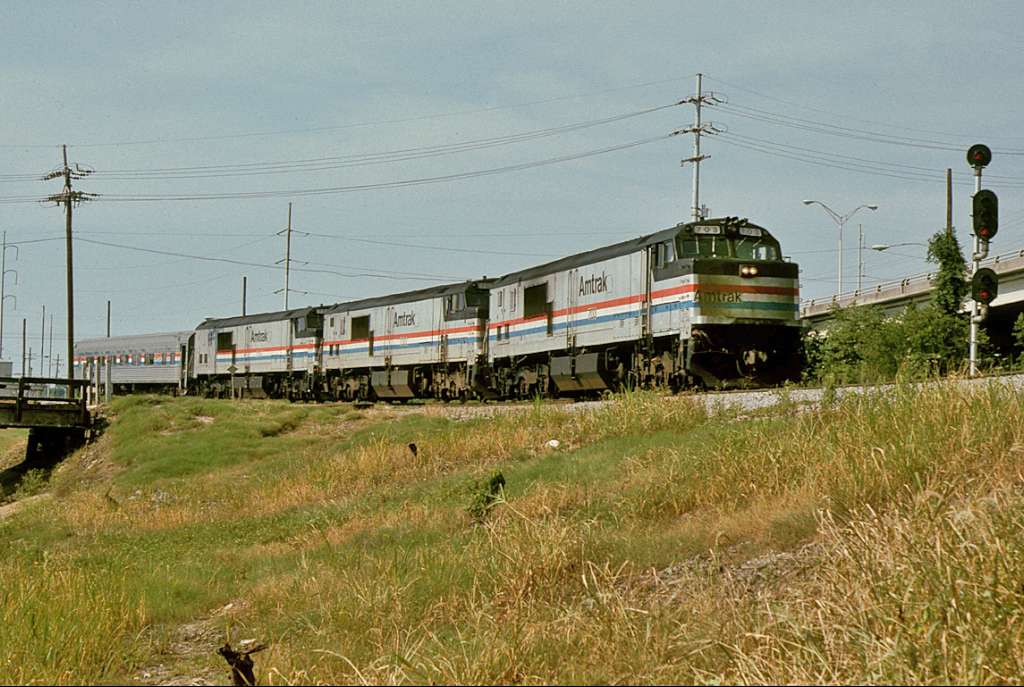
Amtrak P30CH Video Uploaded to YouTubeSince the last blog post about my video collection, I have spent considerable time figuring out how to convert old VHS tapes to an uploadable digital file. I purchased the Roxio VHS to DVD 3 converter, visited my parents to use their VHS player, and gave myself a crash course in the Photoshop Premiere Elements Version 11 software that I accidentally purchased several years ago. This first clip I have chosen to experiment with was a video recorded on June 2, 1991 of soon-to-be retired Amtrak P30CH's 703, 702, and 705 arriving in New Orleans on a special positioning move on the Norfolk Southern. This video is pretty short and employs just a few of the features of Adobe Permiere Elements that I was able to figure out. Going forward, I expect that my video editing skills will improve! It is hard to believe that this video is 25 years old! Back in the day, the video camera accompanied us on many railfan missions. It was passed around quite frequently depending on what other cameras were being used (and whomever ran out of film). It is difficult to determine by looking through the old videos who the photographer was. Sometimes it is easier to determine who the photographer was NOT by seeing who appears IN the video! The first of two scenes in this P30CH clip was not taken by myself as I was positioned inside the curve at Oliver Junction to take the below picture which has been posted on-line for some time now: Interestingly enough, a video of this train passing through Spartanburg, South Carolina has been posted to Rail-Videos.net. It is cool to see how pieces of a puzzle come together long after an event has occurred. The button below will take you to that video:
|
Categories
All
Author:
|
Proudly powered by Weebly
- - - Homepage of the Natchez Trace and Orient Railway and Texas and Great Northern Railway - HO Scale Meridian Speedway - Created by Christopher M. Palmieri - - -
© Christopher M. Palmieri - 1st Publish 12-10-2014
© Christopher M. Palmieri - 1st Publish 12-10-2014


 RSS Feed


