THE MERIDIAN SPEEDWAY
  • Home Page
    • What's New
    • Recommended Links
    • About Me
    • Contact
  • NT&0/T&GN Story
    • Story Variables
    • NT&O & T&GN Are Born
    • The Mexico Connection
  • Prototype Inspiration
  • Library
    • Library - Selected Reading
    • Photo Essays by CMP
    • My Models on YouTube Library
    • Prototype Video Library
    • Prototype Equipment Photo Index
    • Operating Sessions
    • Valuation Library
  • Model Railroad
    • Company Officers
    • Franchise Opportunities
    • Railroads in Network
  • Operations
    • Safety ? Logo
    • MAPS
    • Business Units
    • Train Symbols >
      • T&GN/NT&O Train Symbol Methodology >
        • TGN-NTO MBU-Domestic Symbols
        • TGN-NTO MBU-Mexico Symbols
        • TGN-NTO Local Symbols
        • TGN-NTO Yard Job Symbols
        • TGN-NTO Cycle Train Symbols
        • TGN-NTO Intermodal Train Symbols
        • TGN-NTO Rock Train Symbols
      • Y&MV Train Symbols
    • Equipment Rosters
    • Timetables >
      • GM&O Southern Division Time Table No. 11
  • Models
    • Rolling Stock Main Page
    • Horn Study
    • Decals
    • Locomotive Consists
    • Paint Shop >
      • Paint Scheme Art
  • Blog

Meridian Speedway BLOG

Locomotive Display Shelf Project - Part 1

8/30/2016

1 Comment


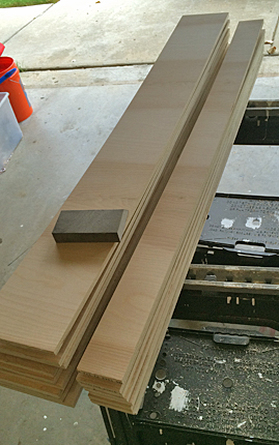
Display Case Construction - Design and Acquisition

As if I do not have enough open projects, I have decided to build a display case to mount on a wall of the man cave for my growing locomotive fleet.  It just is not satisfying to have a fleet of locomotives in boxes, I want to see them!

Some thought went into the design.  I decided that I wanted the shelves to be two-tiered.  I used some half-inch thick pieces of wood to experiment with spacing.  The final verdict: each back shelf would sit 1 1/2 inch above the front shelf.  These shelves would be three inches wide and the main shelves would be six inches wide.​
Picture
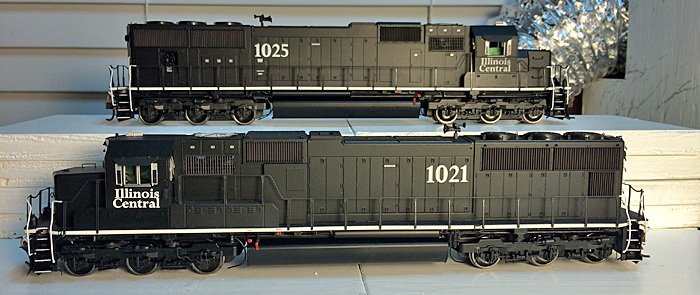
There will then be three-and-a-half inches between the top of each recessed three-inch shelf and the bottom of the next six-inch shelf.

To Home Depot I went to purchase lumber.  I got two 4'x8' sheets of half-inch thick Birch plywood.  I had them rip them into pieces of the following dimensions:

1 piece - 48"x49" - this will be the back of the case
11 pieces - 48"x6" - these are the outer frame and the 6" shelf inserts
8 pieces - 48"x3" - these are the recessed shelves
This was the same type of wood I had purchased for the decking of my railroad.  Previously I had no issues with this wood warping.  Therefore I was surprised to see all of the pieces cut from one of the sheets of plywood warp considerably within a couple of days of purchase.

A bit dismayed I searched for some solutions on-line, most of which involved wetting the wood and placing significant weight on it while it dried. These methods really did not interest me.

I purchased various metal clamps and four sturdy 3' x 1 1/2" x 1 1/2" pieces of Poplar.

Three of the pieces of Poplar I kept hole to clamp each shelf to during installation to keep them straight. The fourth piece of poplar I cut up into various lengths to used as spacers between the shelves.
Picture
As expected, the cuts from Home Depot created some rough edges that would need to be sanded.  A three-pack of fine grit sanding pads from the paint department did the trick!
Picture
The 48"x49" dimension of the back piece was chosen so that all of the remaining pieces could be made from 48" strips of wood.  By making the display case 49" wide, the outer vertical pieces, 1/2 inch wide, would leave 48" in-between that all of the shelves would fit into.
Picture
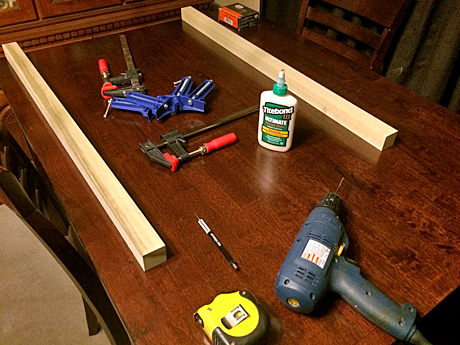
lWith enough clamps and the Poplar braces the warped strips of wood were easy to corner and connect.  First I test fit and clamped the wood pieces together.  Once clamped properly, I traced the outline of the shelf onto the back piece.  After removing the clamped piece I would drill pilot holes in the outline on the back board to guide screw installation.

Then I applied a healthy bead of wood glue to the outlined area and re-installed the shelf, clamping it securely in place.  Once satisfied with the position of the piece being added, I drilled into each shelf using the pilot holes as guides and then screwed them in place.
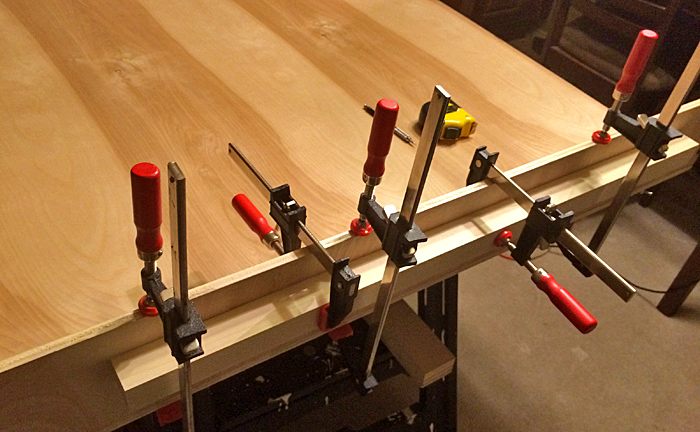
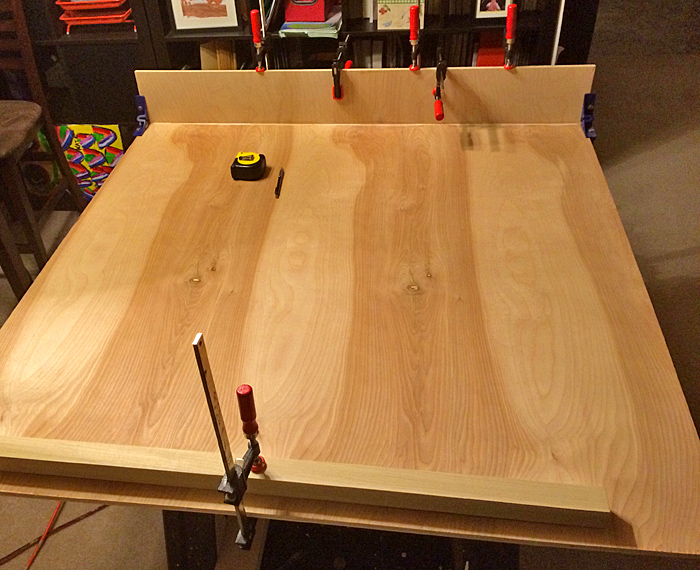
Picture
Picture
More to come...

​Chris
1 Comment
Best IL Terminal Operator link
10/12/2019 10:39:26 am

Useful Info on Illinois Sports Betting

Reply

Your comment will be posted after it is approved.


Leave a Reply.

    Categories

    All
    Dinner In The Diner
    Display Shelves
    Gibsland Layout
    Gulf & Ship Island
    Home Shops LLC
    Layout Construction
    MCRR C425 2425
    Meridian Speedway Library
    Mississippi Central
    NT&O Freight Cars
    Operating Sessions
    Paint Booth
    Photo Essays By CMP
    Photo Scans
    Random Roll
    TGN Business Cars
    T&GN Freight Cars
    TGN/NTO Tedder Green Locomotives
    Vicksburg
    Video VHS To YouTube
    What's New
    Y&MV Freight Cars
    Y&MV GP7 201 Project

    Author: 
    C. M. Palmieri

    Please visit the About Me page for an introduction!

    Archives

    July 2021
    December 2020
    May 2020
    April 2020
    November 2019
    April 2019
    March 2019
    February 2019
    January 2019
    October 2018
    July 2018
    August 2017
    July 2017
    June 2017
    May 2017
    April 2017
    March 2017
    February 2017
    January 2017
    December 2016
    November 2016
    October 2016
    September 2016
    August 2016
    July 2016
    June 2016
    May 2016
    April 2016
    March 2016
    February 2016
    January 2016
    December 2015
    November 2015
    October 2015
    September 2015
    August 2015
    July 2015
    June 2015
    May 2015
    April 2015
    March 2015
    February 2015
    January 2015
    December 2014

    RSS Feed

N.M.R.A.
Contact

"We Have the Time to Identify Risk"


SAFETY FIRST - ALWAYS!

Picture
Picture
Picture
Picture
My Photos on RRPictureArchives.net
Proudly powered by Weebly
- - - Homepage of the Natchez Trace and Orient Railway and Texas and Great Northern Railway - HO Scale Meridian Speedway - Created by Christopher M. Palmieri - - -
© Christopher M. Palmieri - 1st Publish 12-10-2014
  • Home Page
    • What's New
    • Recommended Links
    • About Me
    • Contact
  • NT&0/T&GN Story
    • Story Variables
    • NT&O & T&GN Are Born
    • The Mexico Connection
  • Prototype Inspiration
  • Library
    • Library - Selected Reading
    • Photo Essays by CMP
    • My Models on YouTube Library
    • Prototype Video Library
    • Prototype Equipment Photo Index
    • Operating Sessions
    • Valuation Library
  • Model Railroad
    • Company Officers
    • Franchise Opportunities
    • Railroads in Network
  • Operations
    • Safety ? Logo
    • MAPS
    • Business Units
    • Train Symbols >
      • T&GN/NT&O Train Symbol Methodology >
        • TGN-NTO MBU-Domestic Symbols
        • TGN-NTO MBU-Mexico Symbols
        • TGN-NTO Local Symbols
        • TGN-NTO Yard Job Symbols
        • TGN-NTO Cycle Train Symbols
        • TGN-NTO Intermodal Train Symbols
        • TGN-NTO Rock Train Symbols
      • Y&MV Train Symbols
    • Equipment Rosters
    • Timetables >
      • GM&O Southern Division Time Table No. 11
  • Models
    • Rolling Stock Main Page
    • Horn Study
    • Decals
    • Locomotive Consists
    • Paint Shop >
      • Paint Scheme Art
  • Blog