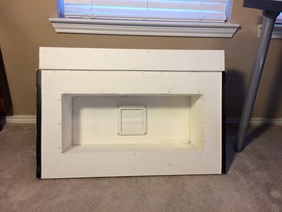
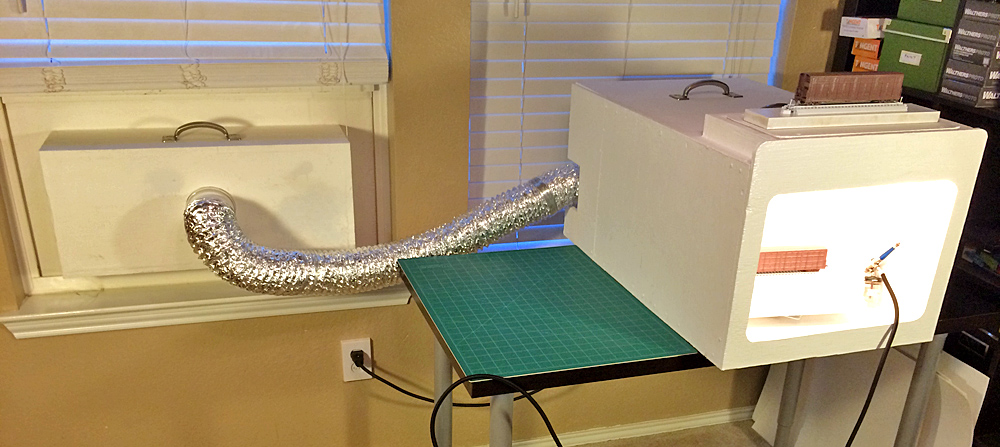
Paint Booth Ready For ServiceIt has been a while since my last update on the paint booth. My children's football, cheer, and gymnastics schedules have cut into my available blog time considerably. I am pleased to announce that all components are complete, tested, and ready for service! Going into off days here, I intend to get a few items painted.  The last booth update included the initial plans for the window exhaust panel. There are only two major design changes to this panel. First, the plan called for an enclosed chamber with a connection to the paint booth duct on the interior panel and a louvered vent on the exterior panel. The exterior panel design was changed, with the center being left open for the entire width and height of the chamber. This was done to allow for better ventilation and dilution of the contaminated air. Another design change was to the top of the panel. Instead of having the top a single panel that tucked behind the window, a channel was created that would cradle the bottom of the lowered window, creating a more secure and air-tight fit. A late modification to both the paint booth and the window exhaust panel was the addition of stainless steel handles to assist with movement of the items as their size makes them a bit cumbersome. The below slideshow hi-lights the window exhaust panel and its placement in the window opening: Once installed in the window, a 4-inch dryer duct with specially designed PVC sockets fits snugly on both the fan motor exhaust and the back of the window exhaust panel. There were some holes in the metal casing of the fan which I sealed with silicone. The next series of images show what the window exhaust panel looks like from the outside. You can notice the change in position of the center louvers when the paint booth fan is turned on. I also created a few accessories to assist with painting. I made a turntable using a couple of scrap pieces of MDF as well as a ball-bearing turntable bracket which cost about $5.00 at the Home Depot. This works remarkably well and was quite simple to make. In addition I nailed two pieces of snap-track to two separate scrap MDF strips for models to sit on during the painting process. These track panels will allow the painted models to be removed from the paint booth without having to be touched. In order to help secure the models during the painting process I used crazy glue to lock one axle on each of the four "shop-trucks" that I put under the models. This is essentially like securing the equipment with a hand brake as I do not want free-rolling equipment on the turntable during painting. A late modification to the paint booth was the addition of a brass hook to each of the side walls inside the main painting chamber. These were stretched open with pliers to allow the paintbrush to fit. This now provides a secure place to rest the airbrush with bottle attached during the painting process. The below slideshow hi-lights this mod as well as the operation of the turntable in the paint booth: It seems like this project has taken an eternity to complete! Many thanks to my uncle Joe Scorsone who did most of the actual construction work on both the paint booth as well as the window exhaust panel. Looking through my blog posts, however, reveals that the timeline for this project only lasted four months! The first blog post was published on 7-9-2015.
I hope to be able to share many great projects that will come form this paint booth! Chris
0 Comments
Your comment will be posted after it is approved.
Leave a Reply. |
Categories
All
Author:
|
Proudly powered by Weebly
- - - Homepage of the Natchez Trace and Orient Railway and Texas and Great Northern Railway - HO Scale Meridian Speedway - Created by Christopher M. Palmieri - - -
© Christopher M. Palmieri - 1st Publish 12-10-2014
© Christopher M. Palmieri - 1st Publish 12-10-2014

 RSS Feed


