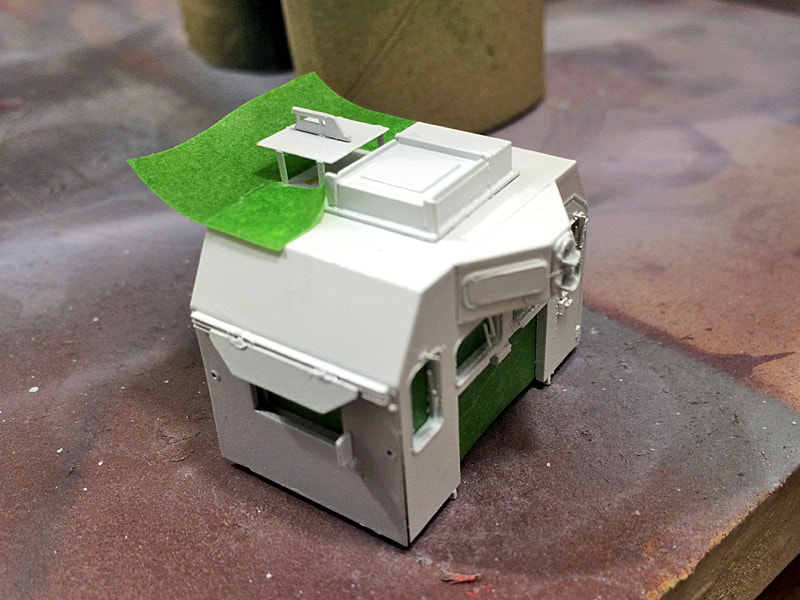
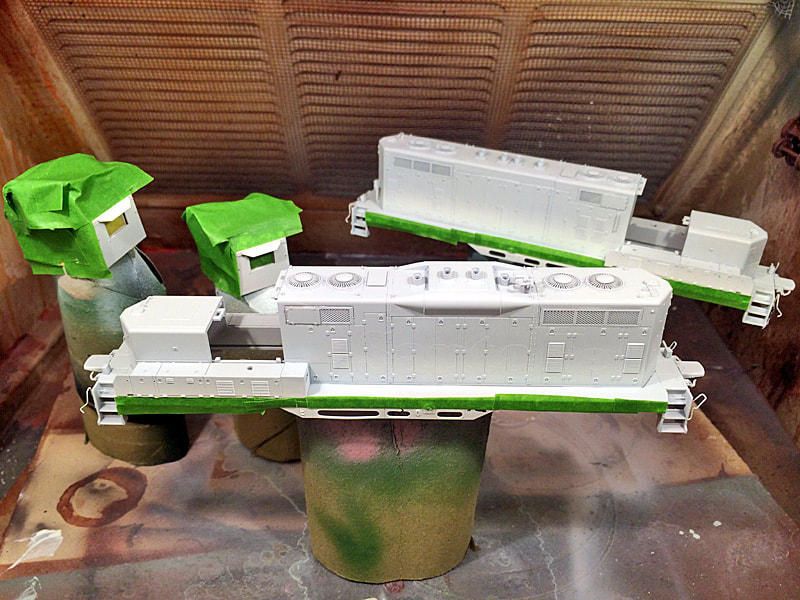
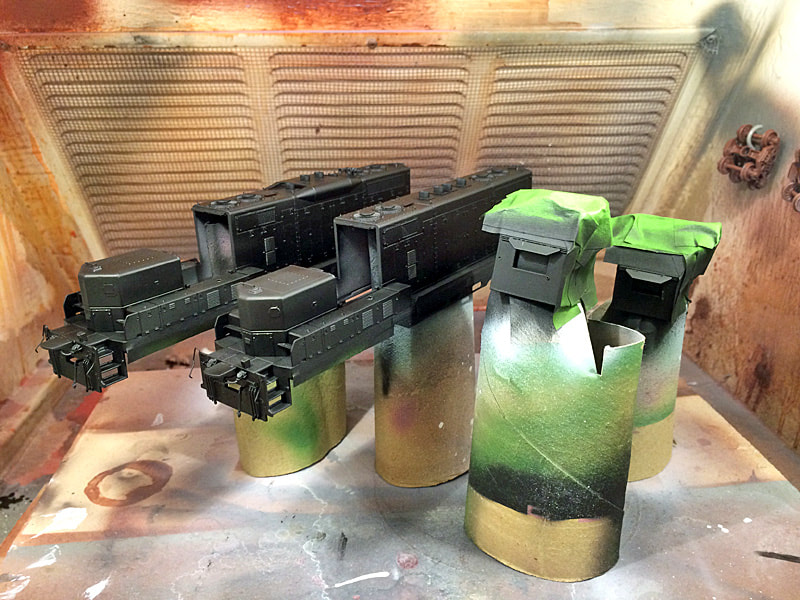
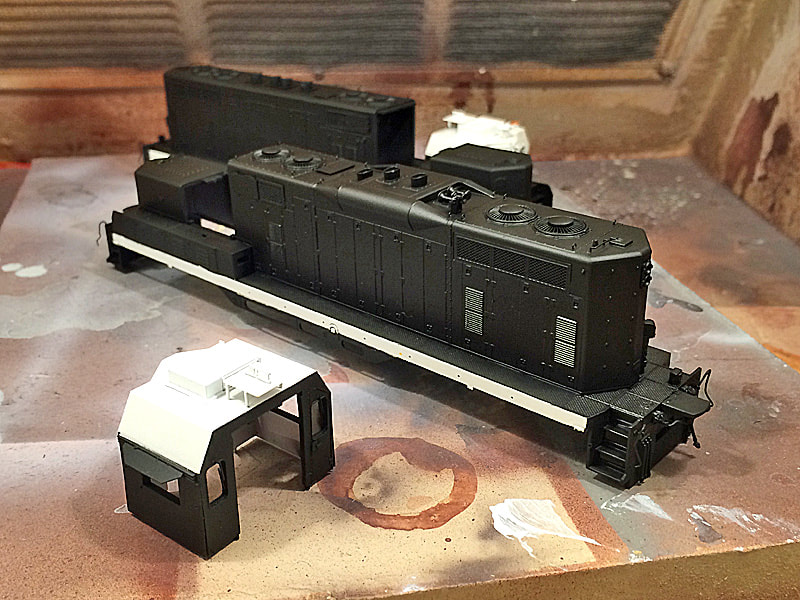
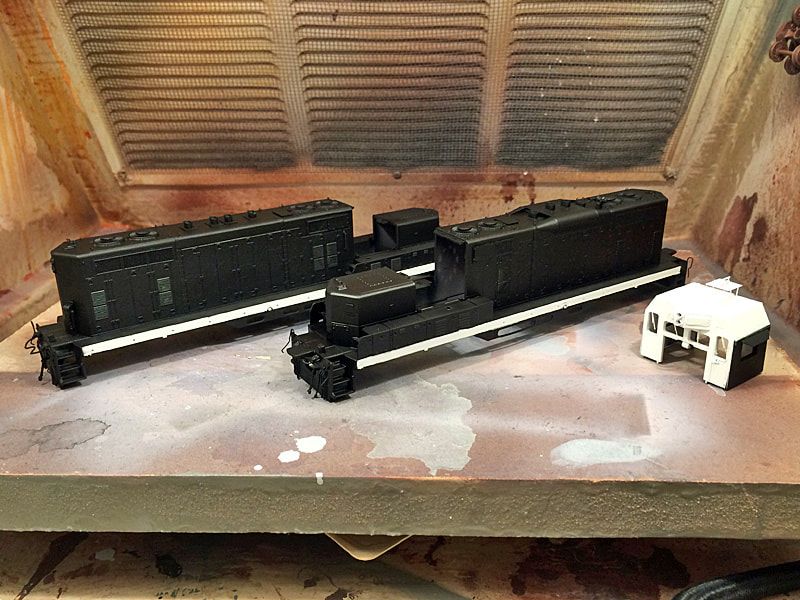
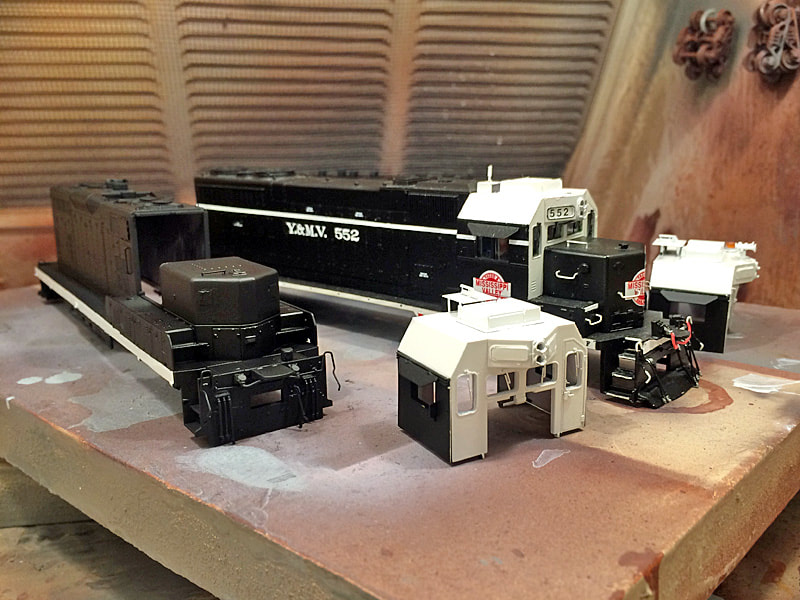
GP7Us Visit the Paint BoothIt has been a long time coming. The ex-Santa Fe GP7Us acquired to become Y&MV 200 and Y&MV 201 have recently been primed and painted white on the cabs and frames. Today I masked the white parts and painted them black. Y&MV 200 and 201 are closer to completion. Chris
0 Comments
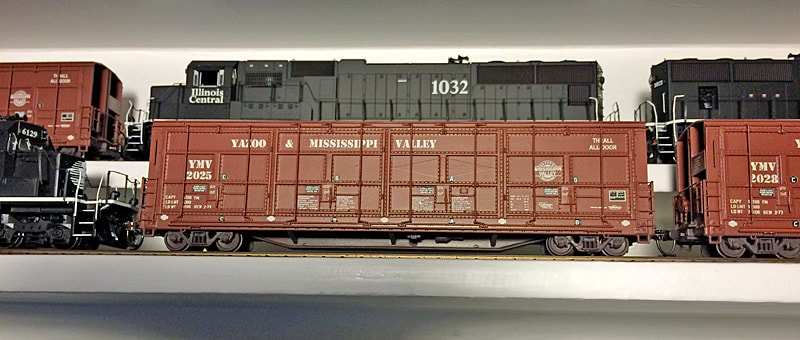
Y&MV Locomotive Roster Made CurrentThe Y&MV locomotive roster has been updated. Previously the roster posted was the 1986 startup roster for my proto-freelanced Illinois Central regional spin-off railroad. Someone has purchased a couple of Y&MV locomotive decal sets from me and will be modeling a few more modern examples from the roster, so it was time to update the roster! I have added acquire/new date and retirement date columns to the roster. This will make it easier to visualize the roster at any given point in time. The button below will take you to the Y&MV locomotive roster page. Chris
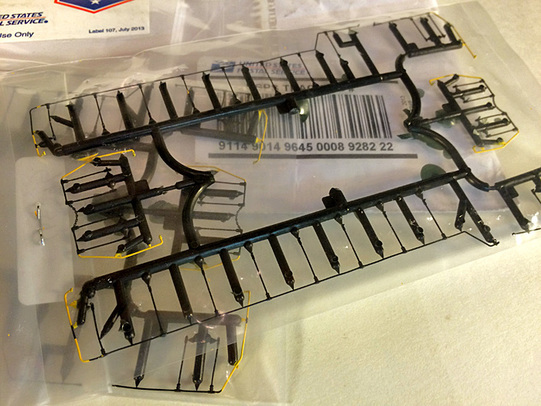
Black Paint on Truck Sideframes - YMV 200/201/552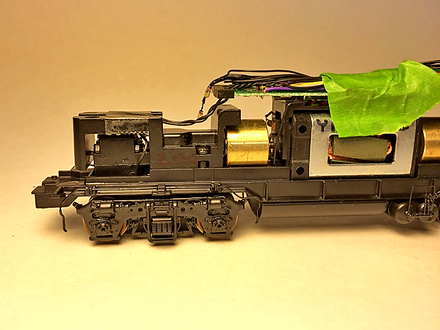 This step has taken a while to complete, primarily due to time allotment as well as complications requiring a second application of paint. Once the trucks were disassembled, care was taken to mask the wheel and gearbox combos as well as all of the machinery above the frame. The truck side frames themselves were left "attached" to the main locomotive by a single soldered wire for electrical pickup. On the Athearn Genesis models, the metal contact strip which completes the electrical circuit from the axle ends to the jumper wires leading to the circuit board are "riveted" to the inside of the truck side frames with melted plastic tabs. To maintain the integrity of this electrical path, masking tape was applied over this strip at every axle contact location. 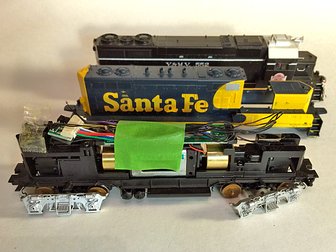 During this process the wheels were brush painted with Floquil rust a total of three times. While most of the wheels will not be visible behind the truck side frames, the rust portions bring out an additional level of detail that will be noticed as the locomotives are photographed over the years to come. Since the wheels on Y&MV SD35 552 had not been painted yet, I decided to include this unit in the process. Truck disassembly with this Atlas locomotive was a bit easier than on the Athearn Genesis GP7u's as the metal axle contact strips were not fixed to the truck side frames, allowing them to separate completely from the locomotive. Both the wheels and truck side frames of the Y&MV 552 were painted at the same time as those of the GP7u's. The truck side frames were airbrushed with a thinned coat of Floquil Engine Black. The molded silver plastic truck side frames on the Athearn Genesis GP7u's actually have a repellent property which caused the Floquil paint to run away from the corners and details. I did not notice the effect on the black plastic Atlas side frames, though it would have been harder to notice due to the plastic and the paint being the same color. 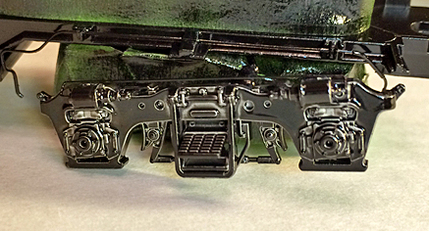 I put the project aside and allowed the Floquil paint to dry for several weeks while I focused on other items. Last week I revisited this project. This time I ran non-diluted Scalecoat II S2001 Loco Black paint through the airbrush. Part of the reason I waited so long was because I wanted to ensure there was no reaction between the two different brands of paint. This time the paint went on very smoothly and evenly. There was no evidence of the repelling effect that the naked plastic had on the first coat of Floquil paint. The project was put aside for a few days to dry thoroughly. The side frames on all three locomotives were put back on the locomotive truck assemblies. On each of the GP7u's one of the truck side frames came lose as the wire broke at the solder location. As the circuitry is redundant the locomotive operate just fine under power. The wires are VERY thin, however, and certainly the integrity of the remaining six connected truck side frames may be compromised. These electrical contacts will be revisited during the DCC decoder installation process. Chris Athearn Genesis GP7 Handrails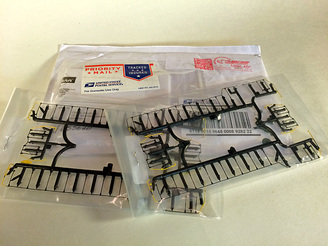 The plastic handrails that came with the Athearn Genesis GP7u models I am using to model my Y&MV 200 and Y&MV 201 are, of course, bright yellow. Unlike the paintable surface of the rest of the models, getting paint to stick long-term to the slick, flexible plastic handrails can be problematic. Yes there are racing car paints and paint flex additives, however, flaking yellow handrails on a black locomotive are not what I want to have to worry about patching up every time these units make an appearance over the next 20 years or so. To eliminate that issue with these locomotives I ordered two complete sets of black molded GP7 handrails from the Athearn parts department. Interestingly enough, they came with the ends painted yellow...some of which was flaking. This will be an easy fix to flake and paint white. These handrail sets arrived in the mail today. Chris
Removing Athearn Genesis GP7u Truck Side FramesPainted wheels are often overlooked by modelers when superdetailing locomotives. Back in the day of Athearn Blue-Box kits, truck side frame removal was pretty simple. As model locomotives have become more complex, so has this seemingly simple process. 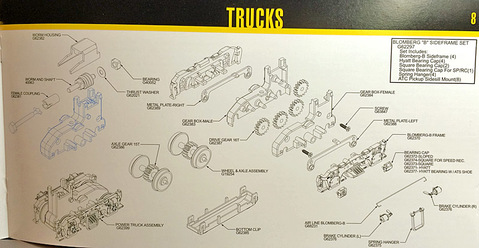 Though not a "must", painted wheels add one more level of realism to the appearance of the final product. With regards to the two Athearn Genesis GP7u locomotives I am converting to Y&MV 200, and Y&MV 201, the truck side frames have to come off as they are silver and need to be painted black. If it were not for the color issue, I probably would not have made the effort to remove the side frames to paint the wheels. Coincidentally, my Atlas Y&MV SD35 552 did not have the wheels painted so I performed that task along with the 200 and 201. The Atlas trucks are a bit easier to deconstruct than the Athearn Genesis trucks. Though they are fundamentally the same style, the tabs on the Athearn Genesis units are a bit more difficult to access. Also the brass contact strips in the Athearn Genesis truck side frames are locked in place as the plastic tabs are melted, essentially riveting them in place. This means that even when the truck side frames are separated from the truck assembly, there is still a wire keeping the side frames attached to the model. Upon first inspection, it was not evident exactly how the truck side frames were attached. I researched the exploded parts diagram provided by Athearn Genesis to determine that the trucks were essentially connected like on Atlas units. This means that the underside of the gearbox is a removable "drip pan" attached with four tabs. These tabs are between the back side of the wheels and the outside of the gearbox so there is little room to maneuver. Athearn Genesis did provide holes in the metal locomotive frame that allow a small flathead screwdriver to pass through and access the top of the outer tabs. When the trucks are turned as far as then can freely rotate, this hole aligns on a tangent pathway leading to the tabs inside the wheels. From here it is simply a careful process of prying tabs on the drip pan over the nubs on the gearbox to free the bottom pan. Once the first two are free, the remainder of the tabs come off easier. Care must be made to handle the model cautiously as there are many detail pieces that can be easily damaged during this process. Once the drip pan has been removed, the model must remain upside-down to prevent the wheel assemblies and gears from falling out. With the drip pan removed and the model upside down, the truck side frames can be pulled out of the gearbox. As soon as the side frames are removed, the bottom drip pan needs to be snapped back in place to keep the contents in place and keep dirt and foreign objects out. I considered cutting the wires to paint the truck sideframes and then soldering them back, but I think it will be easier to mask the model with the truck sideframes exposed for spray painting. With the truck sideframes now removed from the truck assemblies, the wheels are exposed and ready for painting. I still have a bottle of Floquil Rust which I simply brush on, being careful not to paint the axle ends which are needed to conduct electricity to the brass strips in the truck sideframes. I also am careful not to paint the flanges or the treads of the wheels, however, paint here can be cleaned up easily with the locomotive under power on rails covered with an alcohol or paint thinner coated paper towel. Look for truck painting and re-assembly in the next update! GP7u Markings Removed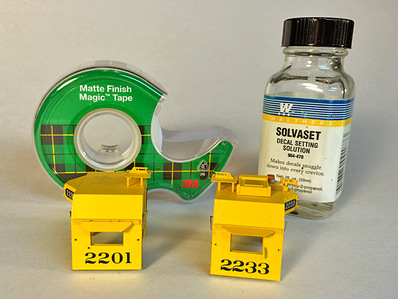 As part of the preparation for the painting process of my two Athearn Genesis GP7u locomotives, I have decided not to strip the paint off of them. Athearn Genesis has done a wonderful job of applying the paint in very thin layers. Fully decorated, the finest details are still very well defined. There is some relief around the color separations, however, that may show through the Y&MV paint. Some of them are acceptable and others not. I chose to leave the "Santa Fe" lettering on the long hood alone as well as the main blue/yellow color separations behind the cab and on the battery box. After all these are intended to represent former Santa Fe locomotives so if upon close inspection of the finished Y&MV locomotives traces of Santa Fe are visible, it is OK. What I did choose to remove were the cab and rear numbers as well as the classic Santa Fe "Cigar Band" logo on the noses. Recently I saw a YouTube video by Josh Clark, a.k.a. NSmodeler24, which introduced me to a new method of removing painted-on locomotive numbers. That video is linked below in this posting for reference.
I tried this method on these locomotives and it worked like a charm! For some areas a second or third pass was required, but really minimal time was required. In addition to the link to Josh Clark's YouTube video, there is a slide show below depicting this process as applied to the Y&MV 200 and Y&MV 201. These locomotives are now getting close to being ready for primer and paint! CMP Removing Marker Lights from Athearn GP7u ShellsAthearn Genesis has done so much work detailing the Santa Fe "Topeka Cab" GP7u rebuilds that there is little detail work for me to do on my models of Y&MV GP7s 200 and 201. These units are intended to represent second-hand former Santa Fe units as they are popular among regionals, short lines, and industrial roads. During a recent visit to Discount Model Trains in Addison, TX I stumbled upon BLMA item No. 4551 - "Removed Headlight Covers". Several of the designs look like patches used by the Santa Fe so I purchased them to try them out. Since my Y&MV is set in 1996, the marker lights molded on had to go. Here is the process I used to remove the molded-on marker lights and install the BLMA removed headlight covers. 1 - With an Exacto knife - slice off the rounded part of the molded light. 2 - Use a push-pin to indent the center of the marker light area to guide the drill-bit. 3 - Drill through each light on the nose. 4 - Sand any remaining raised surface smooth. 5 - Apply ACC to the drilled hole from the inside of the shell. 6 - Place Removed Headlight Cover in position on the outside of the shell (I used the adhesive part of a Post-It note to hande the cover as they are difficult to position. 7 - Sand away any excess ACC. Chris
BradleyDCC Demo Video Published....The long awaited TCS Wow-Sound EMD Diesel Decoder has finally been released. There has been some discussion about it in the Y&MV GP7 201 Project category on my Blog. Arthur Bradley of BradleyDCC was able to secure one of the first decoders available and has installed it on Athearn Genesis GP40-2 NS 3022. Below is his YouTube review of the decoder. Of particular interest is the Turbocharged 567 prime mover sound. Looks like I will move up Y&MV SD35 552 to the top of the sound install list! Chris
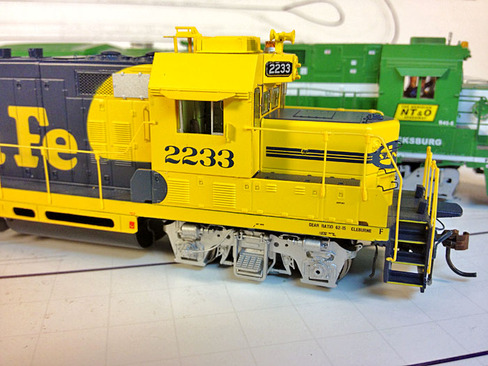
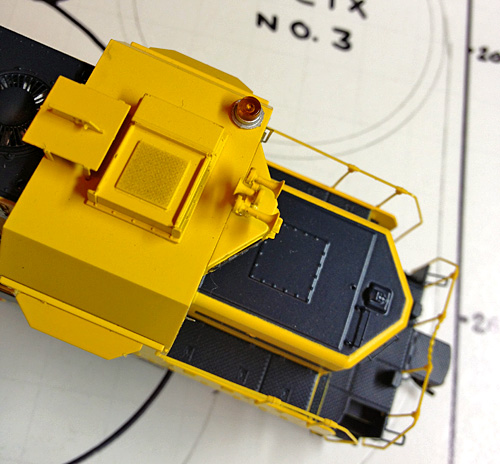
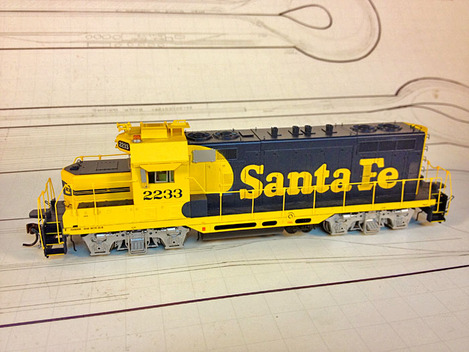
ATSF GP7u 2233 Taken Apart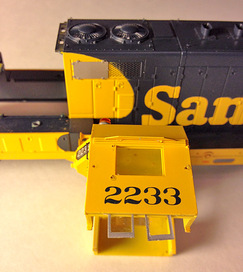 I have deconstructed the Athearn Genesis model of ATSF GP7u 2233 that I purchased to become Y&MV 201. It went a bit better than I had anticipated. The shell came right off once the couplers were removed. Scotch Tape holding the lights in place also came right out. Prying the cab loose required a little patience, but it was relatively easy to remove. There are three tabs that fasten the cab to the body, one at the top of the nose and two at the rear-top of the cab. Pushing the tab through the fastener from the nose allows the other two tabs to be rotated out. The handrails, remarkably, came out with ease. Most of the stanchions I just pulled out by hand. Several required a little encouragement from the tip of an Exacto knife blade. None of the handrails warped as I had expected. I have gotten a response from my inquiry to Athearn and I will purchase black GP7 handrails for the final product. The front and rear cab windows were easily pushed out with a small flathead screwdriver. There was a sticky adhesive holding them in place. The cab side sliding windows were a bit more challenging as they are built into the cab sides. An Exacto knife blade was used to pry the the outer side wall from the main cab structure so that the windows could slide out of the bottom of the cab. I also removed the coupler lift bars as a white decal stripe will go underneath them and I removed all of the grab irons as they would impede the application of the front and rear Y&MV logos. Some of the grab irons did bend, but no worries as I will replace them all with new ones for consistency. The tabs on the main body piece connecting it to the frame are all glued on the bottom of the frame. For my Y&MV models this is not an issue since both the carbody and the walkway are black. For other schemes this could prove a bit annoying resulting in extra masking. Now to decide what to do with the number boards and the horn. I think I will paint over the number boards and leave the Nathan K3LA in place, planning to giving the TSC Wow Sound decoders a try when released. I will also do some work to remove the Santa Fe markings and numbers to create a uniform appearance to the Y&MV 201. Athearn Genesis HandrailsI have detailed and painted many locomotives over the years. The Y&MV 200 and Y&MV 201 will be the first painted Athearn Genesis models I will take apart, paint, and reassemble. Though spectacular models, I am certain that the very thin plastic handrails will not endure the process well. I have seen Athearn Genesis handrails warp when only partially removed. Recently I reached out to Athearn to see if new, black, GP7 handrails can be purchased. Given the ease with which paint flakes off plastic handrails it would be best to use black handrails instead of the yellow ones that come with the unit. Do any of you have experience painting an already decorated Athearn Genesis unit? CMP
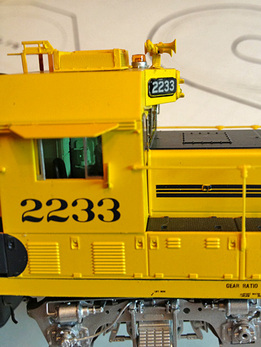
A second Athearn Genesis GP7u arrived today via U.P.S. This one is a model of Santa Fe 2201 and will be shopped to become Y&MV 200. This unit will b processed with the Y&MV 201 so there will not be a separate blog category for it; though I will appear throughout the Y&MV 201 blog. This unit has different features than the Y7MV 201 including the blanked dynamic brake hatch, horns relocated to the long hood, and no cab roof beacon. A Y&MV GP7 200 page has been added to the models page. Athearn Genesis K3LA Horn on Santa Fe GP7u Decision process - Y&MV GP7 201. The Athearn Genesis GP7u ATSF 2233 which I purchased has a very nice looking (in my opinion, anyway) K3LA horn. The model was purchased without sound for the purpose of installing LokSound because the horn sounds on the Tsunami decoders just make me angry that they do not sound better. LokSound has some excellent horn files and just stepped up their game with their latest P5 release (though on the GE 7FDL-16 Modern Soundfile which does not apply to former Southern Railway locomotives). There is not an exceptional K3LA horn file on any decoder that I am aware of. The K3LA became the Santa Fe Railway's standard replacement horn in the late 1970's. Quite possibly there are more modelers of the Santa Fe than any other railroad. This void in sound should be high on the to-do list for sound decoder manufacturers. I will reach out to LokSound to see if any timeline information is available for the release of a K3LA sound. As my good friend Dan Munson has pointed out to me several times, the horn models on the NTO 1065 and the TGN 3149 are NOT Nathan P3 horns, though I have the sound set for a P3. He noticed this on the YouTube videos posted. That being said I need to be more faithful to matching the horn sound with the horn replica used on the models. Though, in all fairness to me, the NTO 1065 and TGN 3149 were completed years before the awesome LokSound P3 came out and gained my interest. As soon as those models make it back to the home shop, the horns will be replaced. So the choices I have are: 1 - Remove the Athearn Genesis K3LA and replace it with a model of a horn that does have a good sound file. 2 - Leave the K3LA and have a mis-matched sound file. 3 - Delay the project for release of a suitable K3LA sound decoder file. The appeal of the K3LA on this model (and, spoiler alert, a second Athearn Genesis GP7u currently in transit to become Y&MV 200) is that it showcases the model's Santa Fe Heritage. Here are a couple of photos of the model of the K3LA on this unit: The buttons below will take you to writeups on horns used by the Santa Fe as well as a closer look at the Nathan K3LA : TCS Decoder Nathan air horn demonstration - Per Arthur Bradley's comment below I have added a button to the TCS video demonstration of their to-be released Nathan air horn sounds. Impressive! The Nathan K3LA is at 1:23 in the video. U.P.S. delivered a new Athearn Genesis GP7u today. Painted as ATSF 2233, this locomotive will be shopped and painted to become Y&MV 201. This will be the first locomotive project since the creation of this web site so I will attempt to chronicle the progress on-line. The Y&MV 201 page has been created and published today for this unit. CMP
|
Categories
All
Author:
|
Proudly powered by Weebly
- - - Homepage of the Natchez Trace and Orient Railway and Texas and Great Northern Railway - HO Scale Meridian Speedway - Created by Christopher M. Palmieri - - -
© Christopher M. Palmieri - 1st Publish 12-10-2014
© Christopher M. Palmieri - 1st Publish 12-10-2014

 RSS Feed


