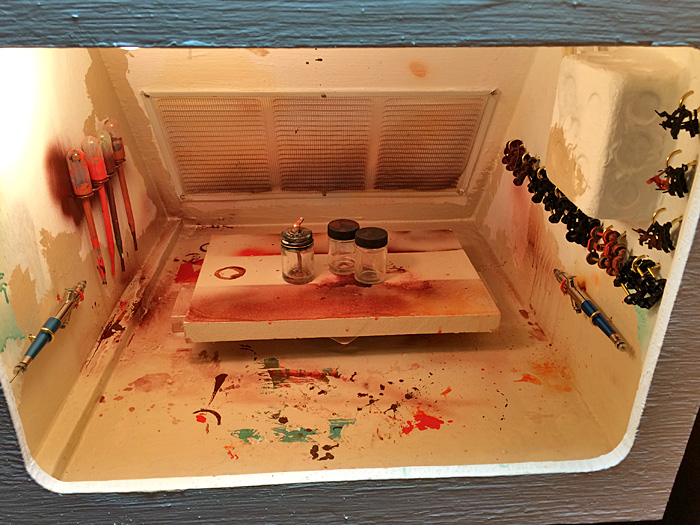
More Hooks Added - 11-30-2015 ModsEverything has its place in a clean and safe shop environment. The paint booth is no exception. Another dozen brass hooks were strategically placed within the painting chamber of the air brush paint booth. A single row of seven hooks spaced two inches apart on the right hand wall are now home to seven pair of shop trucks. Three hooks in vertical formation on the right wall between the front panel and the electrical box will house shop couplers. Finally an additional hook was placed on each wall about 2 1/4 inches to the front of the existing airbrush hooks to cradle resting airbrushes. Everything in its place.
Chris
0 Comments
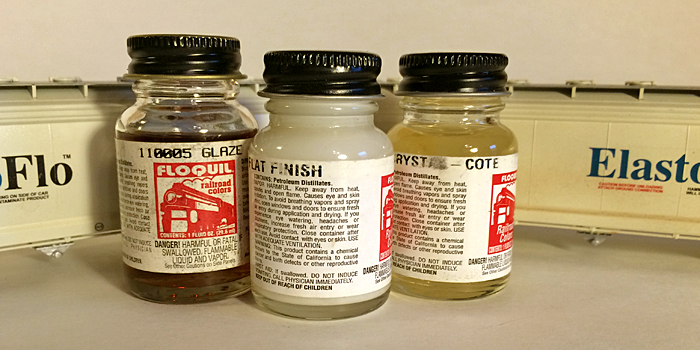
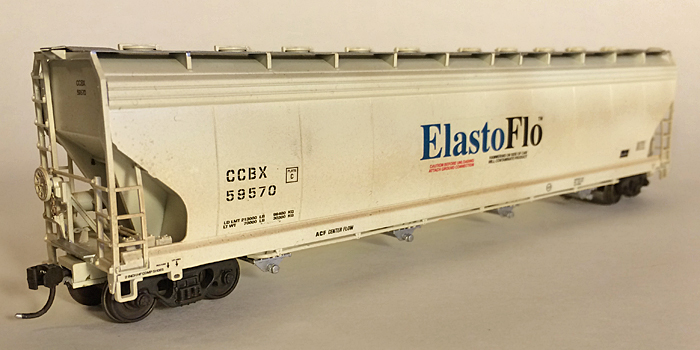
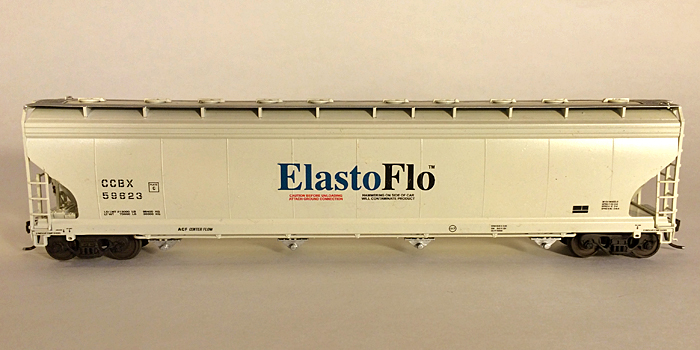
Floquil Crystal Cote, Glaze, and Flat FinishNow that I am getting back into the swing of painting and decaling, it is time to focus on the next step - weathering. Because I have been detached from painting for about five years now, since brfore I moved to Lincoln, NE, my experience lies with products that are no longer available. I'll pose the question here, looking for answers on FaceBook.... Back in the day, my trusty standby mediums for decaling and weathering were Floquil Glaze, Floquil Crystal-Cote, and Floquil Flat Finish. If using Scalecoat II paint, the finish was always glossy enough that I would apply decals directly to the painted surface. If I were painting with Floquil or some other paint that dried with a dull finish, I would spray a coat of Floquil Crystal-Cote to the model before decaling. Once decaling was complete, I would usually spray either Crystal-Cote or Glaze to the model to seal in the decals before weathering. Floquil Flat Finish was always an ingredient in the weathering colors I concocted to spray on the decaled models. Some Glaze or Crystal-Cote might be mixed in as well to achieve the look I may have been aiming for. After the weathering layer dried, I might even spray the model with some mixture of the Trinity to tweak the final finish and seal in the weathering layer. A hint of a secondary weathering color might be included at this level. I found that several clear layers as well a a weathering layer do an excellent job of hiding the edges of the decal film. While I still have a few bottles of the "Floquil Trinity" in my secret stash, I guess it is time to search for a replacement. What are the expert painters using today? I have seen posts touting the use of aerosol cans of flat or gloss finish, however I do not intend to point an aerosol can at my models! I pulled out of couple of CCBX ElastoFlo covered hoppers I painted and weathered several years ago to review. The aim for these cars was a very light weathering with some luster in the finish. The Floquil Trinity was used to achieve this. I look forward to hearing from the airbrush weatherers out there. What are we using today now that Floquil is no-longer?
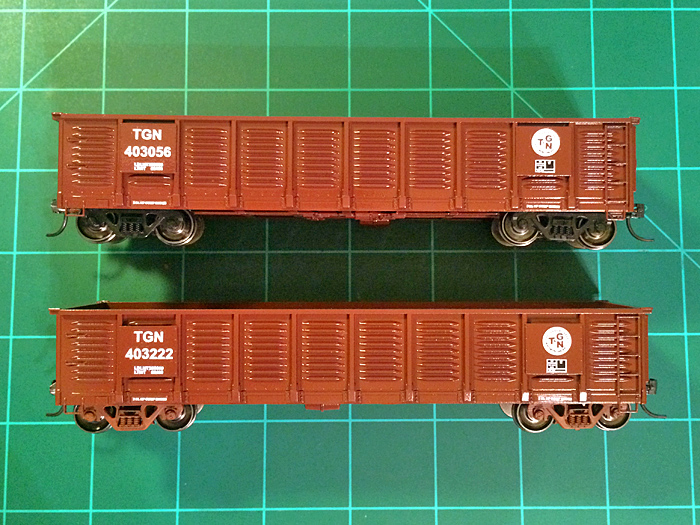
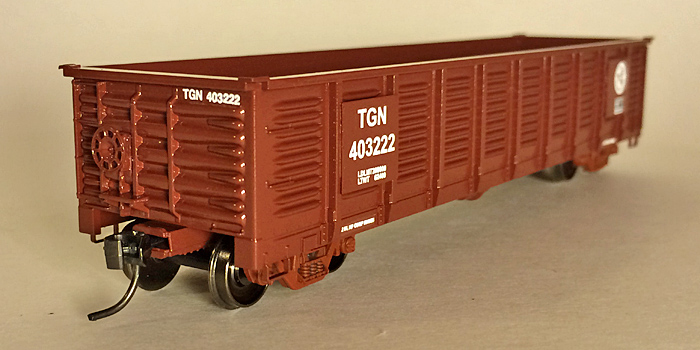
Chris ICG 822649, TGN 403056, and TGN 403222 Get DecalsToday some decaling was on the task list. Specifically the three cars painted yesterday would become ICG 822649, TGN 403056, and TGN 403222. ICG 822649 is the third Walthers 50' Seico Pulpwood Flatcar I pained Scalecoat II IC Orange and lettered for the Illinois Central Gulf using Daniel Kohlberg's decal set ICG-32. The earlier cars completed are ICG 822604 and ICG 822676. The other cars and Daniel Kohlberg's template made fast work of the decal application. I do enjoy working with these decals. Putting the cars together reminded me that the underframe should be painted black. I am not really sure that I will take the time to correct this as I plan to keep the car upright! Next on the work table were the two Gunderson 2420 gondolas. Since I repainted a MP car and a CNW car one has black trucks and one has brown trucks. I am thinking about painting all of the trucks brown but I have not made up my mind. And below are a few more imags of the work completed at the end of the day: Black trucks or brown....that is the question!
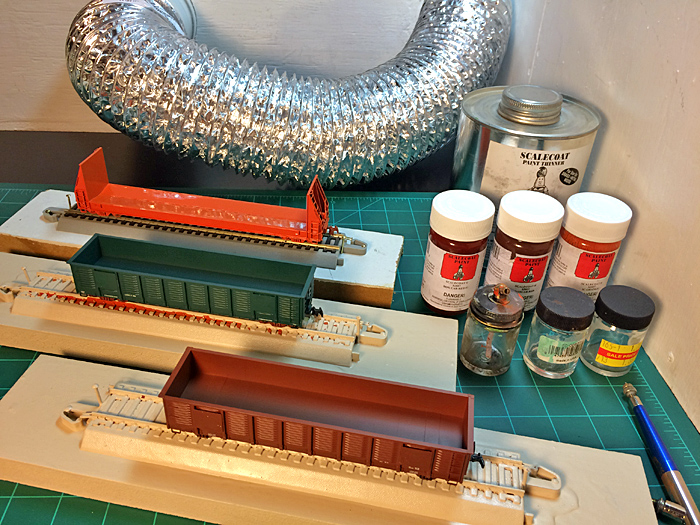
Chris Booth Upgrade and More Cars PaintedHopefully you all had an excellent Thanksgiving! I am starting a week of vacation which means lots of projects around the house. One of the many tasks is the conversion of the kids playroom into my new office and the transformation of the loft into the new playroom. This is a good move for me. Among some of the adjustments today was the movement of my paint booth to my new office. The window exhaust panel fits nicely in that window as well. Of course a test run in the new location was in order! Once in position in the new office I decided to make a modification to the paint booth. I installed six brass hooks inside the booth to hold paint droppers. This will make it easy to find these items and keep more objects with wet paint contained within the painting chamber. This was a very easy mod to make! I had taken the lettering off two of my new Gunderson 2420 gondolas this morning - one MP and one CNW. With another 14 coming to make an even two-dozen, I had better get started painting the fleet. I also needed to an another coat of orange paint to the Seico Pulpwood car I have been working on. Only the upward surfaces needed painted so this car would only get painted upside down. Before painting came some of the preparation - getting everything in order. These gondolas will be the first NTO/TGN cars to be painted brown. For this color I have decided to use a 50/50 mix of Scalecoat II Boxcar Red S2013 and Scalecoat II Boxcar Red #2 S2087. Similarly to the bottle I marked for the Y&MV 25/75 brown formula, I marked a bottle for this 50/50 mix. First up for painting was the ICG Pulpwood Car. My son Jacob took a quick video clip of the paint booth in action: Next up were the two gondolas. I decided not to prime these cars to see just how well the Scalecoat II paint covers the models. With a total of 24 of them in the works, priming each would be a lot of extra paint. This is why I decided to start with one green one and one brown one to see if I can tell the difference once the cars dry. All done. At first glance it appears that the single coat covered the gons quite well. Tomorrow they will get a closer inspection once they are dry. Chris
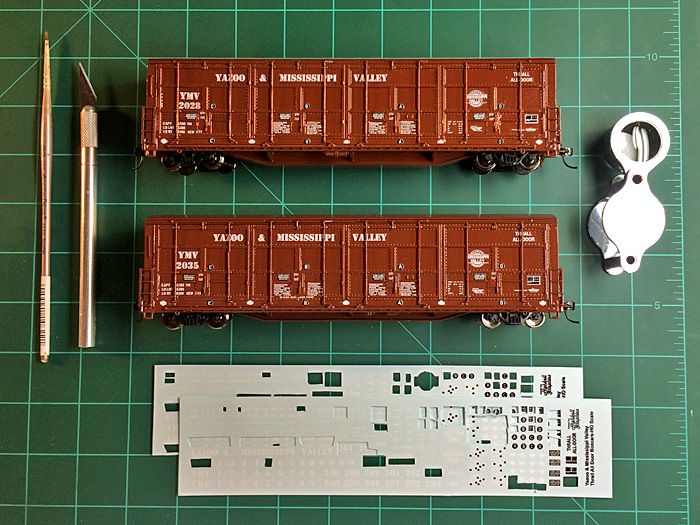
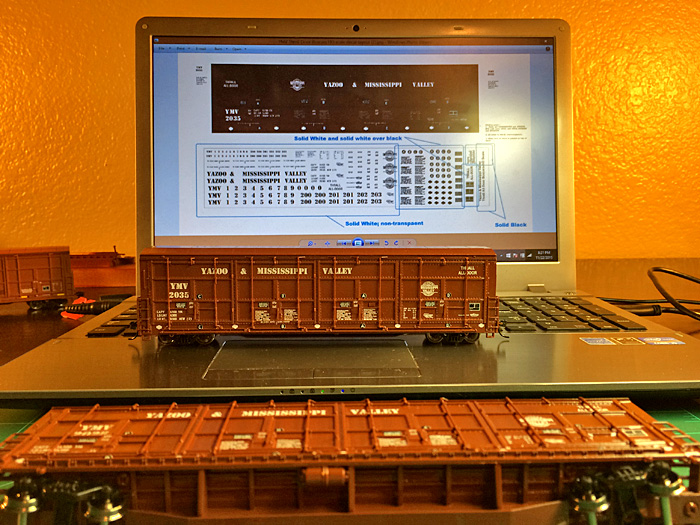
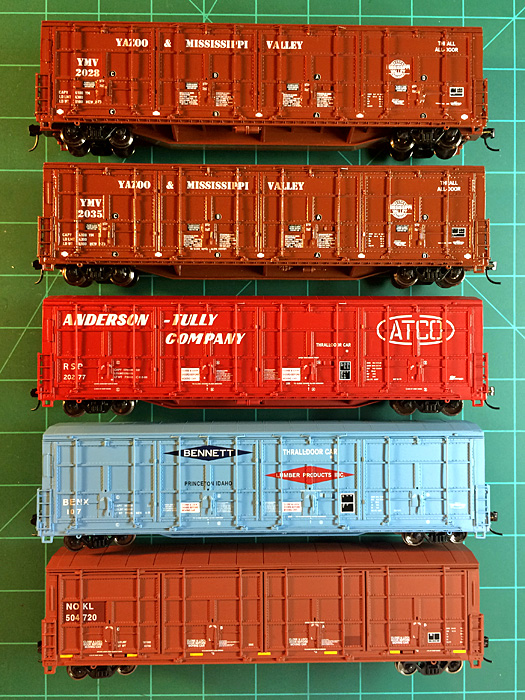
Freight Car Paint StockAs I continue with the cataloging of my freight car fleet I have decided to create a separate section in the Meridian Speedway Freight Car Index for equipment purchased for future custom painting. This will allow me to focus on specific projects and identify surplus equipment. A new page was created for Freight Car Paint Stock. This page can be accessed from the Freight Car Main Index page via a button in a new section under the Rolling Stock Alphabet Section. The button below will also take you to the new page: CMP Y&MV Decals Applied to Thrall Door BoxcarsThis will not be a lengthy update. Yesterday after work I decaled one side of Y&MV Thrall Door Boxcar 2035 and today after work I decaled one side of Y&MV Thrall Door Boxcar 2028. These are officially the first freight cars to be painted and lettered for my proto-freelanced Yazoo & Mississippi Valley. The decal artwork was designed by Hank Stephens and the decals were printed by Highball Graphics. Many thanks to both for a job well done! The decals were very easy to apply. Hank Stephens and I corresponded a bit on the element design for the decal sets. All of the features I wanted were included. In an earlier post I shared his artwork for the car. This can also be seen on the monitor in the below image. With the actual model and decals in hand, I made some minor adjustments on the actual placement of a few items based on best fit locations with the odd-shaped door panels on these unique boxcars. I am quite pleased with the results. In addition to the artwork I had a few additional Walthers Thrall Door Boxcars on the table for reference. Yes, they will be future Y&MV repaints.... Chris
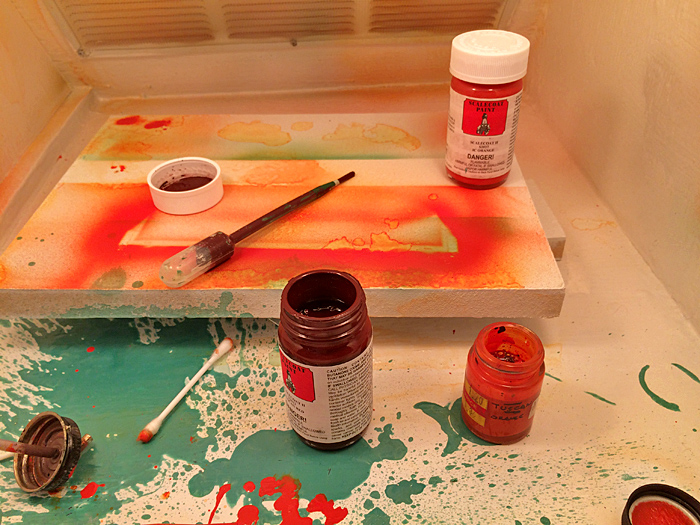
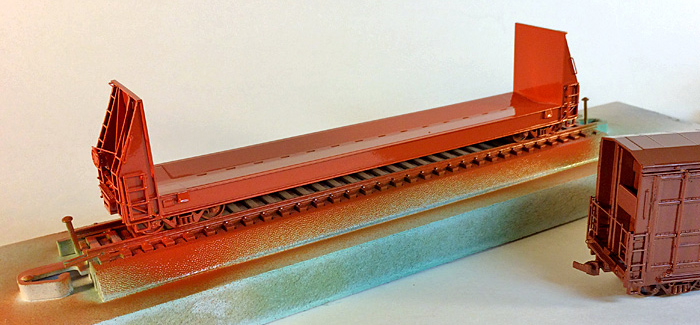
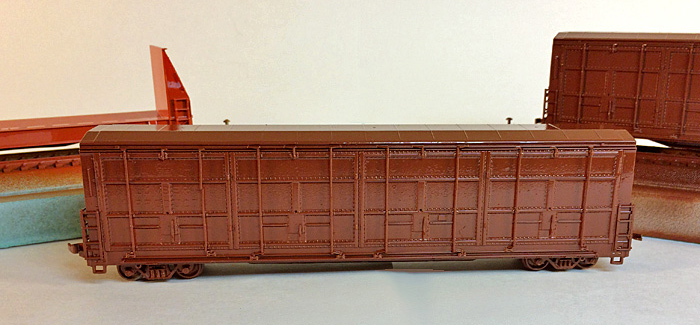
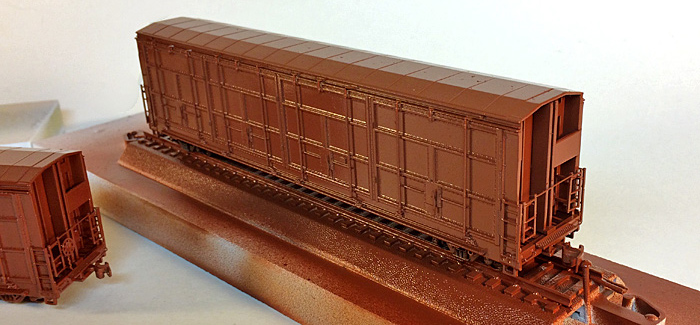
Pulpwood Flat and Thrall Door Boxcars PaintedThis morning I was able to do some painting in the new paint booth. It has been almost five months since I applied primer to the first two Y&MV Thrall All-Door boxcars with unsatisfactory results. It was this event that inspired me to build a paint booth for future painting. In the interim I have formulated the color for my brown Y&MV freight cars. The formula is 75% Scalecoat II S2027 IC Orange and 25% Scalecoat II S2012 Tuscan Red. Yes, I know that the Scalecoat brand is changing hands...we will have to wait and see what the future holds. Since I would be painting with the IC Orange, I decided to first paint the Walthers 50' Seico Pulpwood Flat that I had primered with Joe Bohannon's Chinook Lines Gray straight orange. I have already painted and decaled two of these cars ICG, and I have on-hand three more ICG pulpwood car decal sets. After a thorough cleaning, my trusty Badger single action airbrush was ready for painting.
I had hoped that painting in a more controlled environment would allow the less-than-perfect primer coat on the Thrall-Door boxcars to remain. As the final paint layer dries, it looks to me like the cars will be just fine! Once the cars are decaled, gloss-coated, weathered, and clear-coated I am certain they will be sharp looking models. I am very pleased with my color selection for my Y&MV brown. The shade of brown is very appealing! Using IC Orange as the base for this color subliminally ties this equipment in with IC/ICG orange equipment that will be roaming the rails of the Meridian Speedway with them. Below are a couple of shots of these cars drying this evening: Chris
Meridian Speedway Rock Train Car Fleet Begins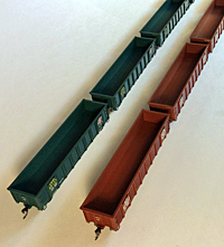 Rock trains have always been interesting to me and I have incorporated them into the Meridian Speedway playbook. Unit trains of all types are appealing. With a healthy rock network there are many varieties of equipment possibilites. In contrast to unit coal trains where, though some cars are hoppers and some are rotary gondolas, all of the cars are generally about the same size and shape; the cars in rock trains can vary greatly in appearance. Difco dump cars, MW ballast hoppers, Ortner 100-ton hoppers, other manufacturers 100-ton hoppers, and various gondolas, usually shorter in length, make up the bulk of rock train rolling stock. The Gunderson 2420 Cuft gondola was only ordered by one railroad, the Southern Pacific, which rostered 900 of the cars. ExactRail produced a very nice model of this car in their more economical Express Series. While it is nice to see model manufactures replicate a freight car that was only owned by one railroad, it does not happen very often as it can be difficult to recoup tooling costs and make the project profitable. One way of trying to make such a project a success is to offer the model in fictitious road names, which ExactRail has done with the Gunderson 2420. Though the MSRP is a very reasonable $22.95, these cars just did not fit into my plan. I keep coming back to the ExactRail monthly specials, however. This month ExactRail is offering the Gunderson 2420 for $12.95, an unheard-of price for a car of this quality! So a second look at the cars was in order. Cost is a factor in the purchasing decisions made by the equipment groups of prototype railroads. Simple economics is a factor that just cannot be ignored. These cars are perfectly suited for rock train service, though I do not know if the Southern Pacific ever used them to haul rock. If there is a time to start the Meridian Speedway rock car fleet, it is now. A review of the offerings revealed that the ExactRail CNW and MP cars (both fictitious) are very similar. As these cars have corrugated panels, the CNW and MP versions have two flat pieces "welded" over the second and ninth panels to facilitate the display of reporting marks, road number, and railroad logo. These flat sheets are the same size on both the CNW and MP cars with their placement on the CNW cars being slightly higher than on the MP cars. I decided to split my first order evenly between the CNW and MP cars, ordering five of each. They will be split up fairly evenly between the T&GN and the NT&O after being run through the paint booth. This is one of the advantages of going the proto-freelance route. The first shipment of ten of these cars arrived on Monday, 11-16-2015. This equipment purchase inspired me to reach into the Meridian Speedway master spreadsheet and retrieve the rock train data. I have created a page under the operations tab for the T7GN/NT&O rock train symbols. The button below will take you to that page: Chris
Air Tank Upgrade, Compressor Failure, and First PaintLast Friday, yes...Friday the 13th, was a busy day for Meridian Speedway Paint Shop progress! The morning began with a trip to Home Depot for a few components to upgrade my air tank, followed by the disappointment of the failure of my compressor to start up. That evening Joe Bohannon of the Chinook Lines and his wife came over for dinner. He quickly found the issue with my compressor and fixed it. He also brought a few locomotive shells, his own paint experiment, and his airbrush. All of this led to an impromptu test-run of the new paint booth!  The air intake valve that I have used on my air tank will work with any hose fitting that will air-up a car tire. I have had this tank for over 20 years and it was designed to take to the corner gas station and fill with air. Moving forward, I never have made adjustments to the original plumbing (built by Lenny DiMartino), not even after I purchased a large air compressor over 15 years ago. This meant that as the tank ran out of air I had to stop the painting process and manually refill the air tank. Considering the time invested in this paint booth project to the end of a better painting process and higher quality painted models, I decided now was the time to fix this. I was hopeful that there would be quick-connect appliances that would fit right onto the current threaded intake pipe, however, I was not to be so lucky! Instead I decided that the best route would be to install a quick connect valve between the tank and the existing piping, allowing two methods for filling the tank with air. The below slideshow hi-lights the modifications to the air tank.  Modification complete, I was now ready to break-in the paint booth with a test run...or so I thought! I had the window exhaust panel in place and connected to the paint booth. The air tank hooked up to my airbrush via a new hose (the old one desperately needed to be replaced), and I had hooked up the compressor to the air tank. I was excited by this arrangement as the compressor hose is long enough to allow the very noisy compressor to remain in the garage while connecting to the air tank several rooms away. Then I plugged in the compressor, flipped the power switch, and...nothing! My trusty compressor of many, many years decided to pick this moment to not start! I was displeased. To YouTube I went to research this issue and figured it was probably the starter switch.  Coincidentally fellow DFW area model railroader Joe Bohannon had reached out to me on this day to see if there were any opportunities to do any model railroading. I explained to him my task for the day and my obstacles. By the end of the conversation a plan was in place and we had company lined up for dinner. Joe and San Antonio area modeler Anthony Lorch had already collaborated on the issue of the disappearing brands of paint facing the hobby and are experimenting with a creative solution. Joe has some unique colors for the locomotives of his Proto-Freelanced "Chinook Lines". Most notably is a difficult to describe gray/blue/green...ish color that he got from a German military color pallet. He thought I might be interested in this as the greens for my T&GN and NT&O locomotives were victims of Testors' genocide of the Floquil line of paint and are no longer available. Joe, with a clear head, quickly honed in on the issue with my compressor, a power wire had come off the connection under the starter switch cover. The fix was very simple...and we had air! Joe did bring his own compressor and airbrush along with a quart of acrylic enamel paint from Sherwin Williams to test. The quart, matched to his model paint using Sherwin Williams' "Spectrometer", cost $22. The quart of course yields 32 ounces. Considering that most model paints are sold in the range of $3 to $6 per ounce, the cost savings is worthy of notice. After dinner, it was time to paint. I decided that the Chinook Lines color would make a good primer so I grabbed a Walthers 50' Seico Pulpwood Flatcar from my repaint stock, removed the couplers, installed shop trucks, and we were set. Unfortunately I guess I failed to properly clean my airbrush after the last use and an unexpected blast of air went into the paint bottle, instantly adding a neat gray/blue/green...ish explosion pattern to the inside of the paint booth. It was christened properly! Deciding to deal with that later, we substituted Joe's double-action paint brush and we were spraying. A few test sprays were in order and the paint/water mixture was adjusted. The below slide show shows the the painting of the pulpwood car as well as one of Joe's GP7 shells. So I was definitely out of my comfort zone here. I have never before sprayed with a double-action airbrush, never before airbrushed a water-based paint, and of course the painting environment was new. The paint booth worked like a charm! No explosions, no fire, and excellent ventilation. The ultimate test came from Joe's wife who declared that she could not smell paint in the house.
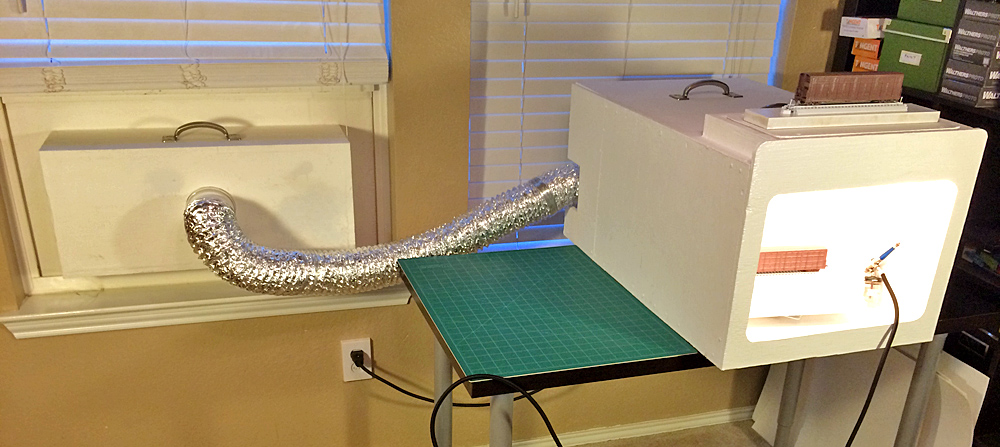
I must admit I was a bit skeptical about using house paint on a model. The result of this test has my attention! The finish was remarkably smooth and thin. I think that once I get comfortable with the properties of this paint there are excellent results to be had. Many thanks to Joe Bohannon for his assistance! Now to get this airbrush cleaned out... Chris Paint Booth Ready For ServiceIt has been a while since my last update on the paint booth. My children's football, cheer, and gymnastics schedules have cut into my available blog time considerably. I am pleased to announce that all components are complete, tested, and ready for service! Going into off days here, I intend to get a few items painted. 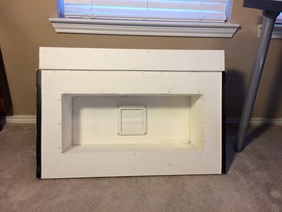 The last booth update included the initial plans for the window exhaust panel. There are only two major design changes to this panel. First, the plan called for an enclosed chamber with a connection to the paint booth duct on the interior panel and a louvered vent on the exterior panel. The exterior panel design was changed, with the center being left open for the entire width and height of the chamber. This was done to allow for better ventilation and dilution of the contaminated air. Another design change was to the top of the panel. Instead of having the top a single panel that tucked behind the window, a channel was created that would cradle the bottom of the lowered window, creating a more secure and air-tight fit. A late modification to both the paint booth and the window exhaust panel was the addition of stainless steel handles to assist with movement of the items as their size makes them a bit cumbersome. The below slideshow hi-lights the window exhaust panel and its placement in the window opening: Once installed in the window, a 4-inch dryer duct with specially designed PVC sockets fits snugly on both the fan motor exhaust and the back of the window exhaust panel. There were some holes in the metal casing of the fan which I sealed with silicone. The next series of images show what the window exhaust panel looks like from the outside. You can notice the change in position of the center louvers when the paint booth fan is turned on. I also created a few accessories to assist with painting. I made a turntable using a couple of scrap pieces of MDF as well as a ball-bearing turntable bracket which cost about $5.00 at the Home Depot. This works remarkably well and was quite simple to make. In addition I nailed two pieces of snap-track to two separate scrap MDF strips for models to sit on during the painting process. These track panels will allow the painted models to be removed from the paint booth without having to be touched. In order to help secure the models during the painting process I used crazy glue to lock one axle on each of the four "shop-trucks" that I put under the models. This is essentially like securing the equipment with a hand brake as I do not want free-rolling equipment on the turntable during painting. A late modification to the paint booth was the addition of a brass hook to each of the side walls inside the main painting chamber. These were stretched open with pliers to allow the paintbrush to fit. This now provides a secure place to rest the airbrush with bottle attached during the painting process. The below slideshow hi-lights this mod as well as the operation of the turntable in the paint booth: It seems like this project has taken an eternity to complete! Many thanks to my uncle Joe Scorsone who did most of the actual construction work on both the paint booth as well as the window exhaust panel. Looking through my blog posts, however, reveals that the timeline for this project only lasted four months! The first blog post was published on 7-9-2015.
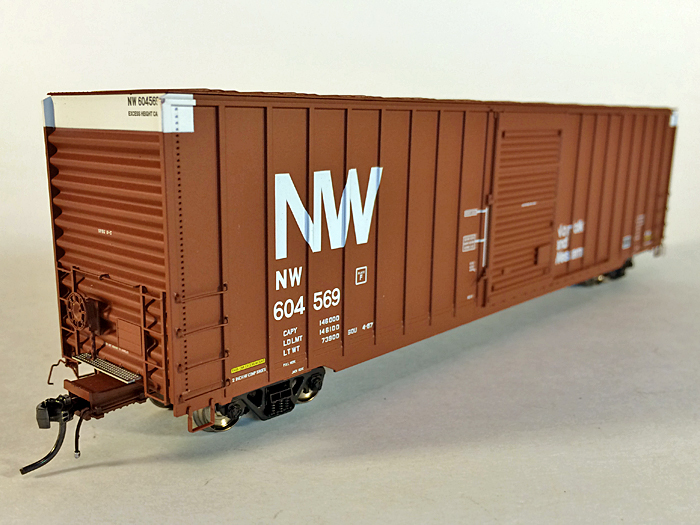
I hope to be able to share many great projects that will come form this paint booth! Chris Stat Page Added to Index - NW 604569I have created a page for the NW 604569 complete with a detailed slideshow! Clicking on the image above will take you to the NW 604569 Stat Page.
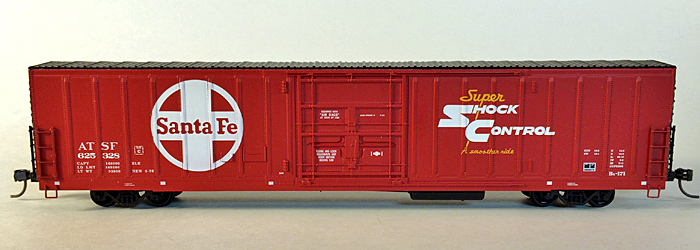
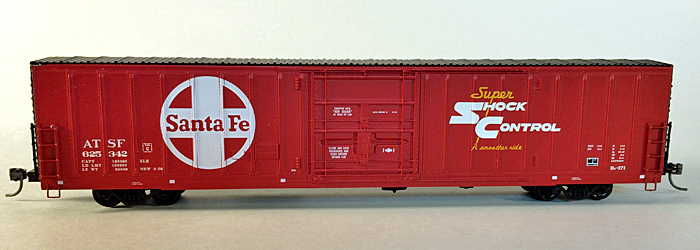
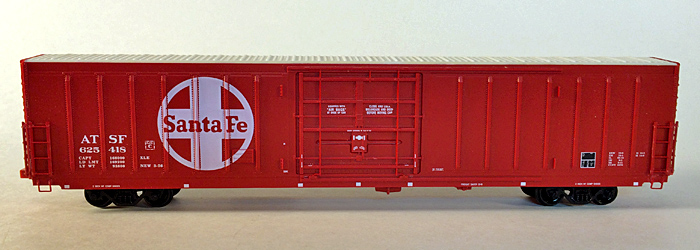
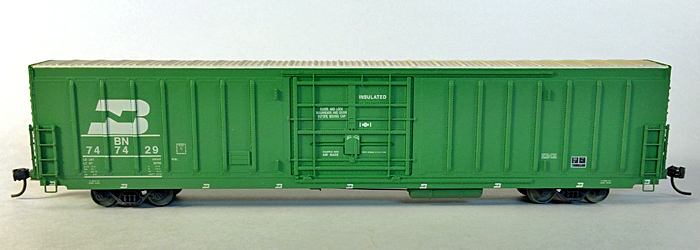
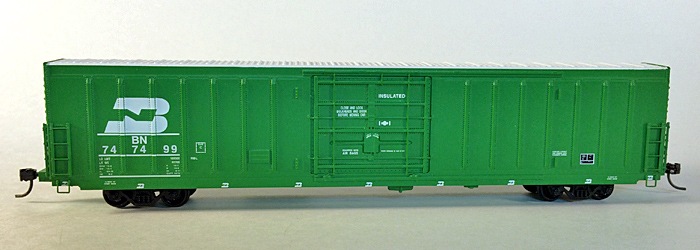
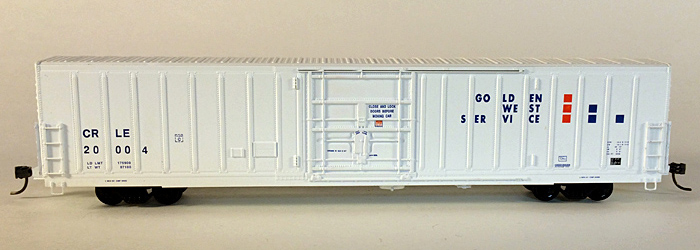
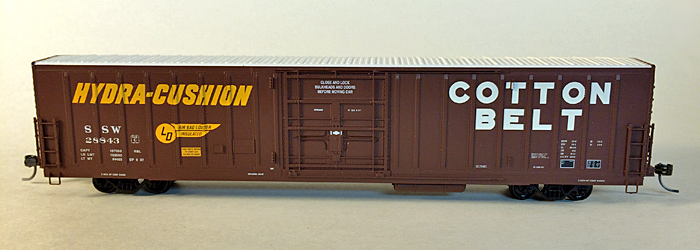
Chris PC&F Insulated Boxcar ModelsThe recent delivery of the ExactRail 62' PC&F insulated boxcars to the Meridian Speedway prompted me to reach for my small stash of Eel River Models' version of the beer car next in my cataloging process. 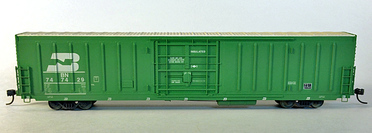 These cars were first released as a kit. At the time the cars were considered cutting-edge with some very crisp details. I purchased a handful of the kits and assembled one, a model of ATSF 625418. Eel River Models subsequently released a Ready-To-Run version of the car which appealed to my schedule. Looking through the collection it appears that I picked up six of those. Since then I have sold the balance of the kits which were never put together. The Eel River Models cars are a nice compliment to the ExactRail cars with a different sill profile as well as two door sizes. They do sit a bit lower than the ExactRail cars adding variance and interest to the fleet. The Eel River Models do, however, have plastic wheels which will have to be replaced. The RTR cars in the fleet are ATSF 625328, ATSF 625342, BN 747429, BN 747499, CRLE 20004, and SSW 28843. The RTR ATSF cars are red with a black roof and black ends while the ATSF kit has a white roof and red ends. The large Santa Fe herald on the kit is much weaker with the red bleeding through than the heralds on the RTR cars. The Santa Fe prototype cars had red roofs and either black or red ends. I think the three Santa Fe cars in the fleet may become repaint fodder. SSW 28843 is very good looking to me with the exception of the road number. For some reason the first "8" in 28843 is printed right on a vertical outside brace. I think this is something that I can overlook, for now! Eel River Models no longer exists. RailShop Inc. has taken over the remaining inventory. Two kits are still available on their website, a Missouri Pacific car and a Southern Pacific car. The button below will take you to their website: Below are images of the seven cars in the fleet: Chris
300 Car Mark ReachedOne of many, many projects in motion is the cataloging of my HO scale freight car fleet. I am methodically going through them, entering each one both on an Excel spreadsheet as well as in the Freight Car Index on this site. The Excel spreadsheet tells me that I am now at 300 cars.... As I refine the process, I have added a few steps. I am now taking the time to unpack and photograph all of the cars as I go along. On each of the header sections of the individual Letter Pages I am creating slideshows of cars whose reporting marks begin with the respective letter for the page. I think this makes the database a little more interesting to the visitor and allows the long-packed equipment to be viewed. It is interesting to come across cars I forgot I had! The slideshow below consist of images of the cars I added today: The button below will take you to the main Freight Car Index Page..... Chris
|
Categories
All
Author:
|
Proudly powered by Weebly
- - - Homepage of the Natchez Trace and Orient Railway and Texas and Great Northern Railway - HO Scale Meridian Speedway - Created by Christopher M. Palmieri - - -
© Christopher M. Palmieri - 1st Publish 12-10-2014
© Christopher M. Palmieri - 1st Publish 12-10-2014






 RSS Feed


